Improve
Updates for Rock 6.0
No updates made.Updates for Rock 1.0
No updates made.Updates for Rock 2.0
No updates made.Updates for Rock 3.0
No updates made.Updates for Rock 4.0
Below is a summary of the updates for this version.
- Added information on enabling Snapshot Isolation.
Updates for Rock 5.0
No updates made.Updates for Rock 7.0
No updates made.Updates for Rock 8.0
No updates made.Updates for Rock 9.0
Below is a summary of the updates for this version.
Updates for Rock 13.0
No updates made.Updates for Rock 14.0
No updates made.Updates for Rock 17.0
No updates made.Updates for Rock 18.1
No updates made.
Introduction
Looking for information on how to host Rock internally? Well look
no further. In this step-by-step guide we'll walk through the
process of getting Rock up and running. Before we jump in,
let's cover a few things to make sure we get started off on the right
foot.
Preparing for Rock
In this chapter we will cover what you need for Rock to perform at its best.
System Requirements
Rock was developed on Microsoft's ASP.Net platform so it requires
a Windows Server environment to run. Below are specific requirements
of the hosting platform:
Small Installs
1,000-5,000 records
Single server with the following specs:
- CPU: 2Ghz dual core or higher
- Memory: 2GB or higher
- Storage: 2TB
- Operating System: Windows Server 2008 or 2012
- SQL Server: SQL Server Express 2012/2014 (free) or SQL Server 2012 Standard or higher
Medium Installs
5,000-15,000 records
Two servers with the following specs:
Web Server
- CPU: 2Ghz quad core
- Memory: 8GB or higher
- Storage: 2TB
- Operating System: Windows Server 2012
Database Server
- CPU: 2Ghz quad core
- Memory: 8GB or higher
- Storage: 4TB
- Operating System: Windows Server 2012
- SQL Server: SQL Server 2012/2014 Standard
Large Installs
15,000+ records
Two servers with the following specs:
Web Server
- CPU: 2.5Ghz quad core
- Memory: 16GB or higher
- Storage: 2TB
- Operating System: Windows Server 2012
Database Server
- CPU: 2.5Ghz quad core
- Memory: 16GB or higher
- Storage: 8TB
- Operating System: Windows Server 2012
- SQL Server: SQL Server 2012/2014 Standard
Helpful Info:
If you plan to install Rock on a two server configuration (think
web server, database server...), be sure to check out the
Special Configurations
chapter for information on how to do so.
Things You'll Need During Installation
Here is a short list of settings that you'll need to complete the Rock installation.
- Email settings for your email server
- Internal and external web addresses for your organization
- An email address to send exception messages to
Other Considerations
Windows Updates
Rock's foundation is built upon Microsoft's
.NET technology. Since .NET is an ever-evolving technology,
we recommend that you install all the latest updates for your
Windows Server.
Server Version
The instructions and pictures in this guide are written for
Windows Server 2012. If you plan to install Rock on Windows
Server 2008, there are a few differences in the installation
you will need to watch out for. Keep an eye out for the
Windows Server 2008 tips.
Certificates
As you configure Rock, make sure you purchase and configure
an SSL certificate before making it available at a publicly
accessible domain.
Prices range from $9–$100+ per year, and while the setup may
seem daunting, there are plenty of helpful tutorials that walk
you through the setup process. Also, you can check with your
current domain registrar to see if they offer SSL Certificates.
If you're new to SSL, Google provides a
detailed list of best practices.
Now that we have these things covered, let’s begin!
Installing Server Roles & Features
In this chapter, we'll install the required server roles and features
needed for Rock.
Windows Server 2008
If you are installing Rock on Windows Server 2008, you will need
to install .NET Framework 4.5.1 Client from Microsoft.
Click Here
to download.
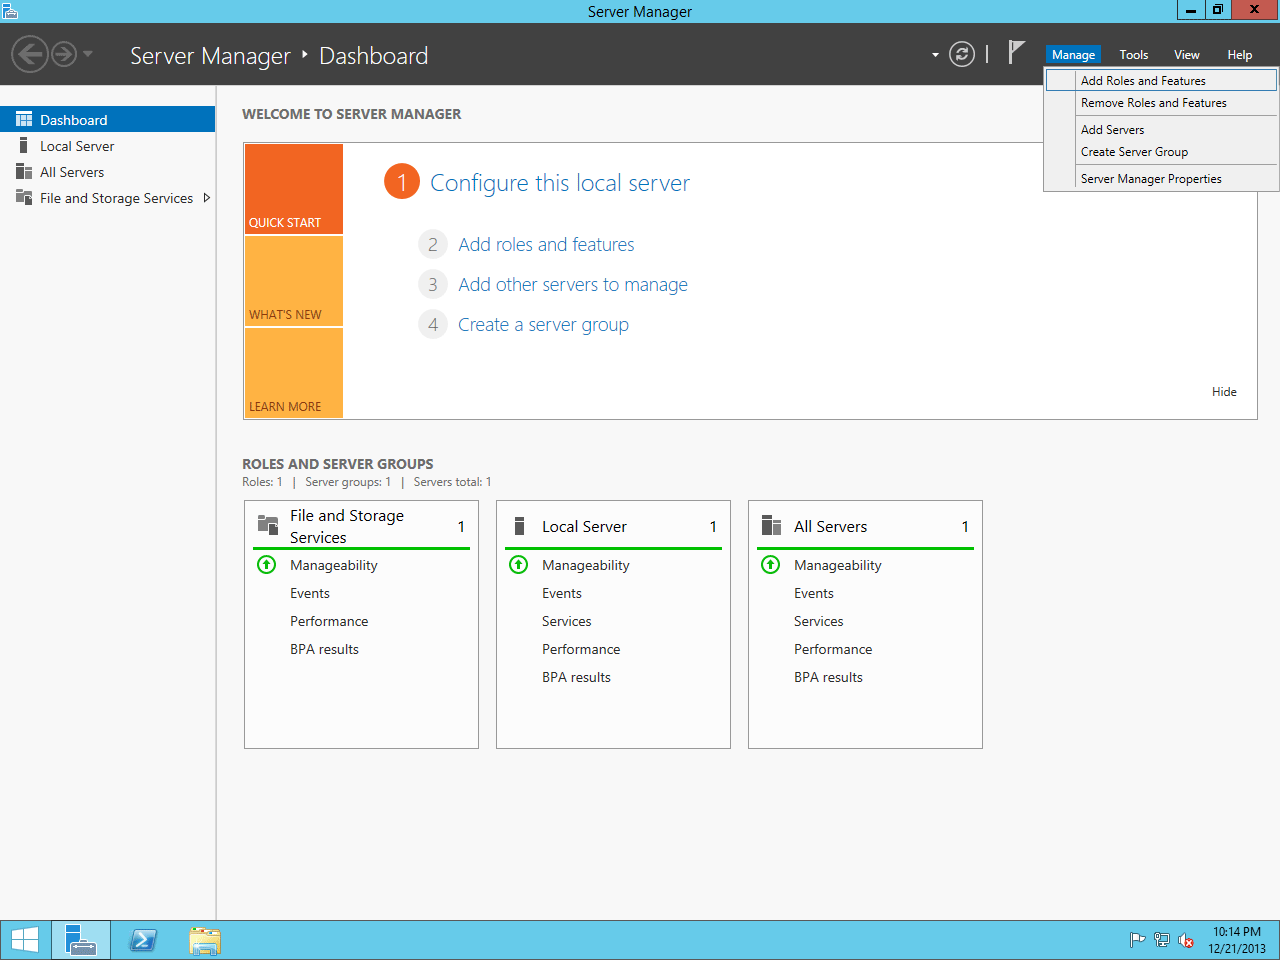
Let’s open up Start > Server Manager. Once opened, the first thing we need to
do is to install the Web Server role. That can be done by
clicking on Manage and then Add Roles and Features.
Server Manager Dashboard
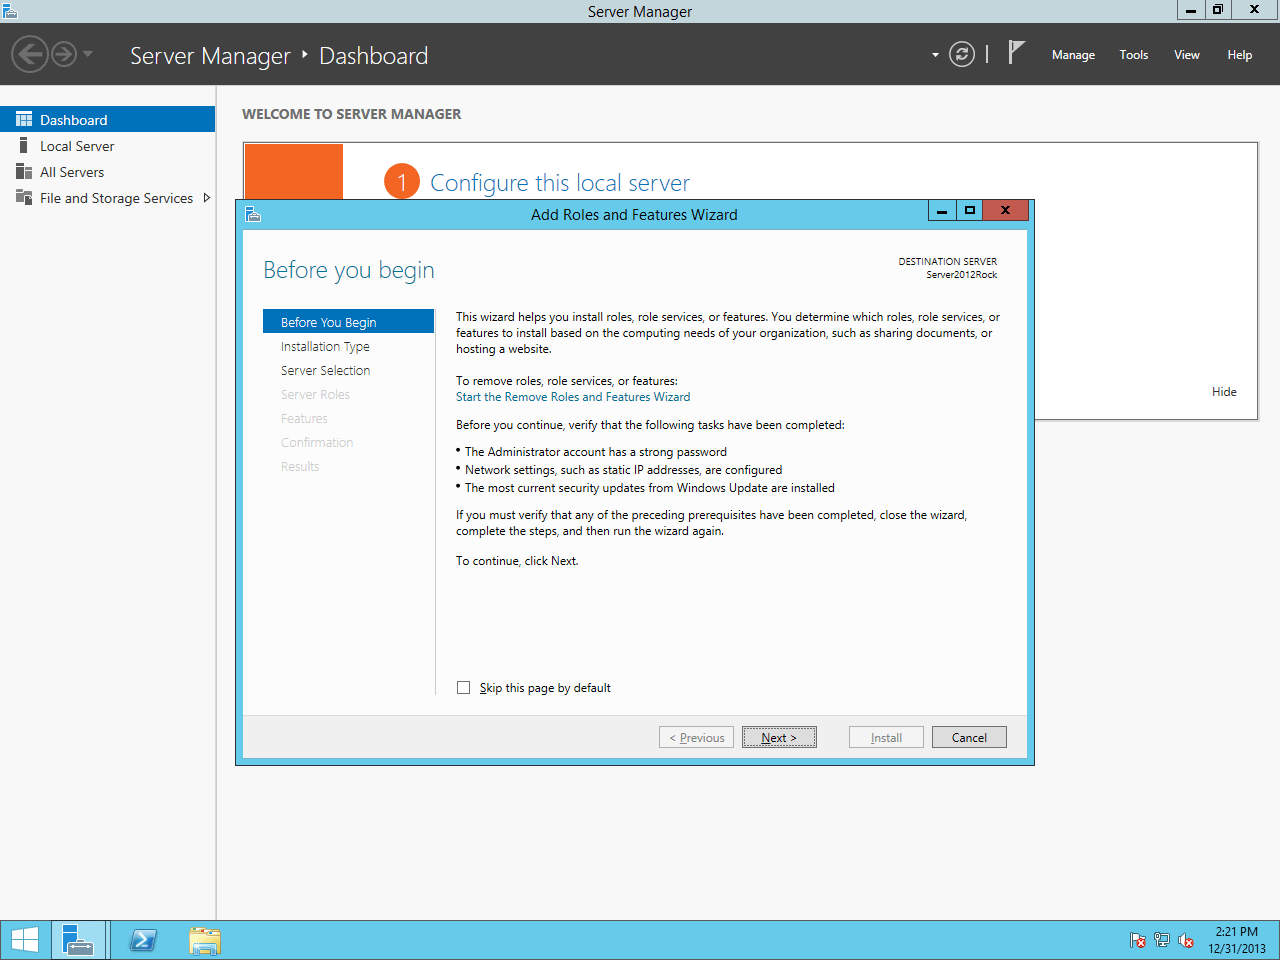
Click Next.
Add Roles and Features Wizard
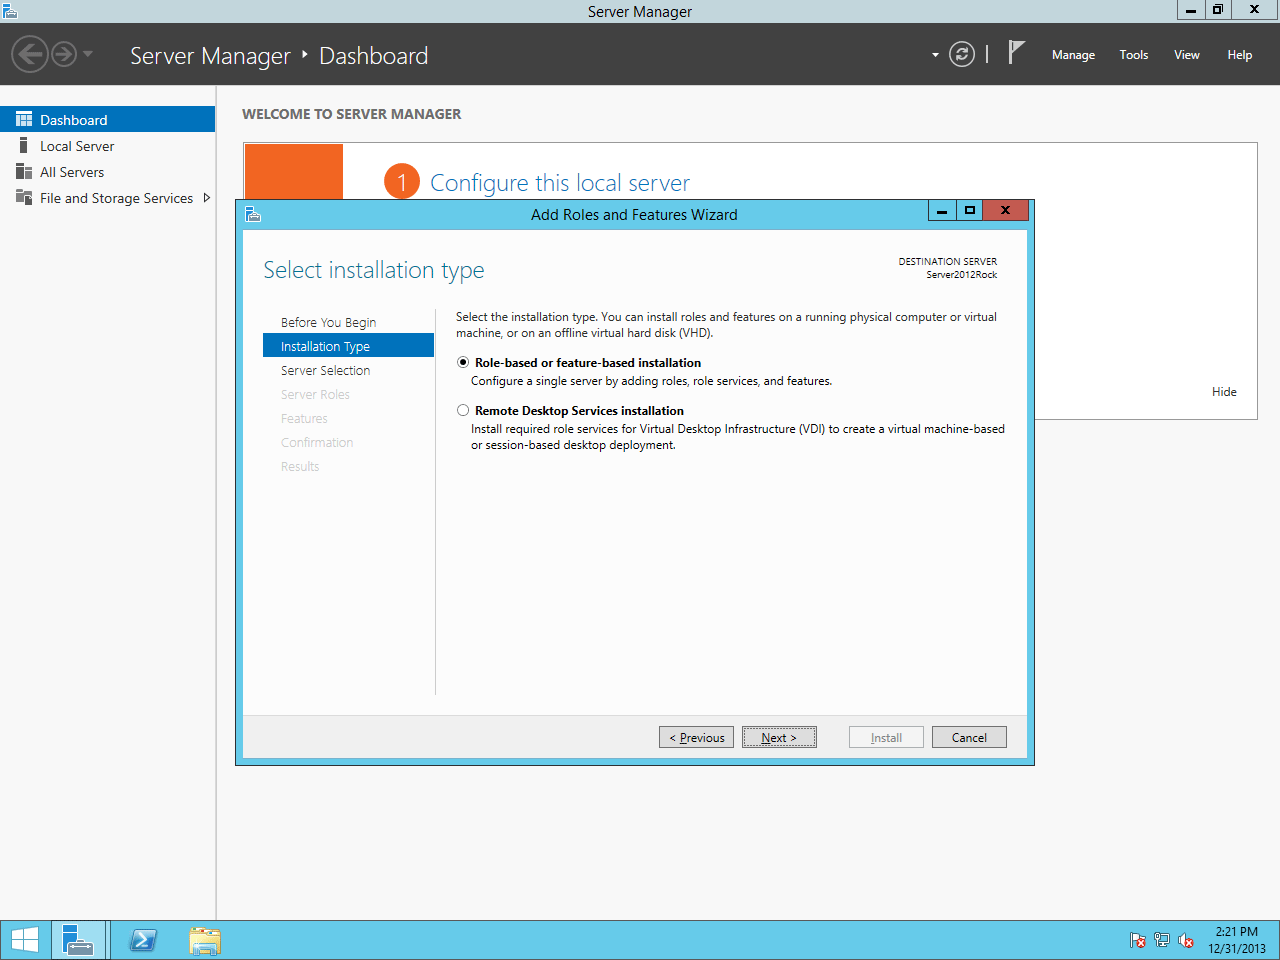
On the next screen, select Role-based or feature-based installation.
Select Installation Type
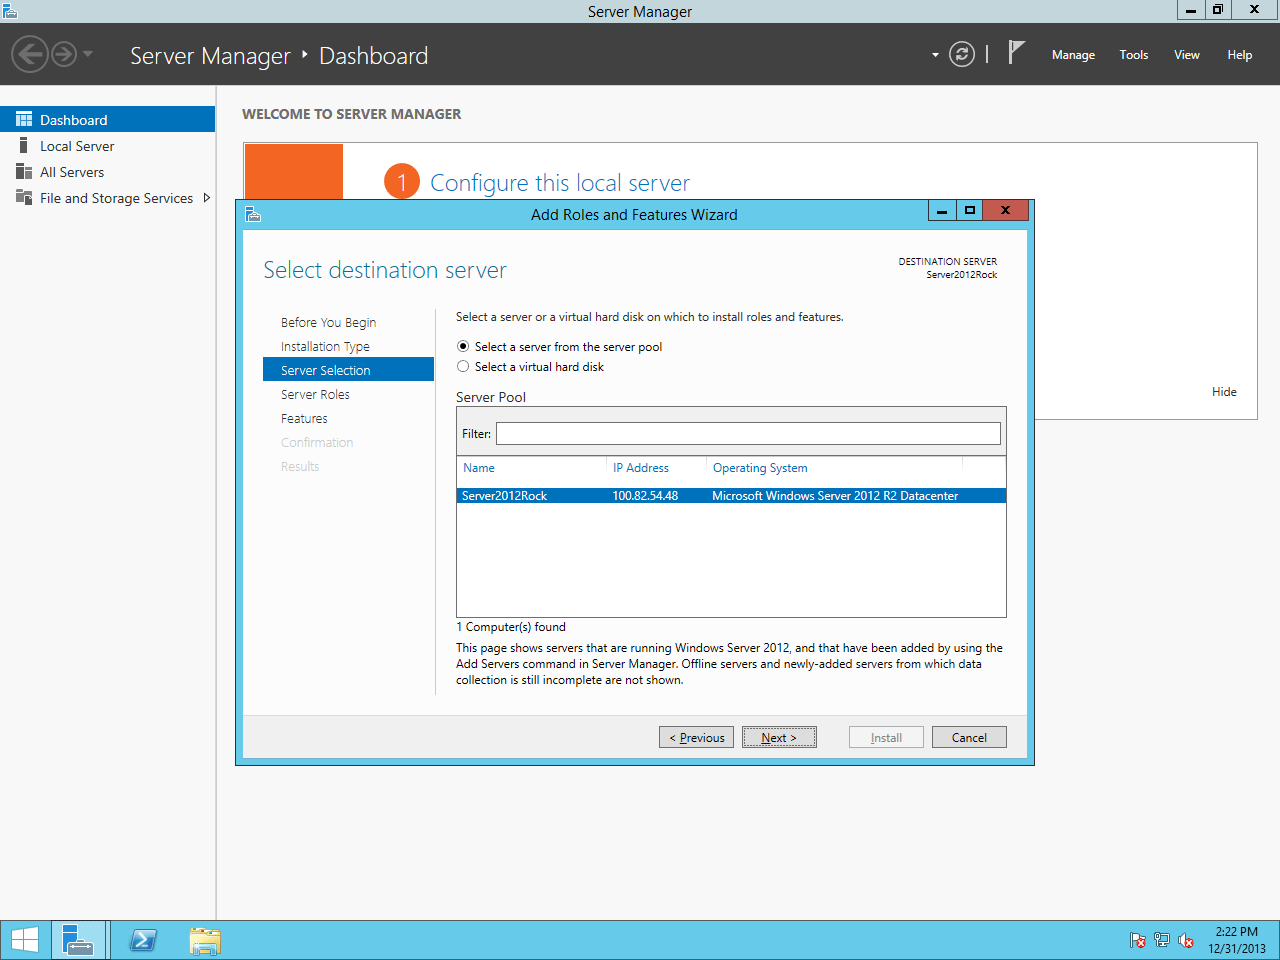
Choose Select a server from the server pool and then highlight your server from the list below. Click Next.
Select Destination Server
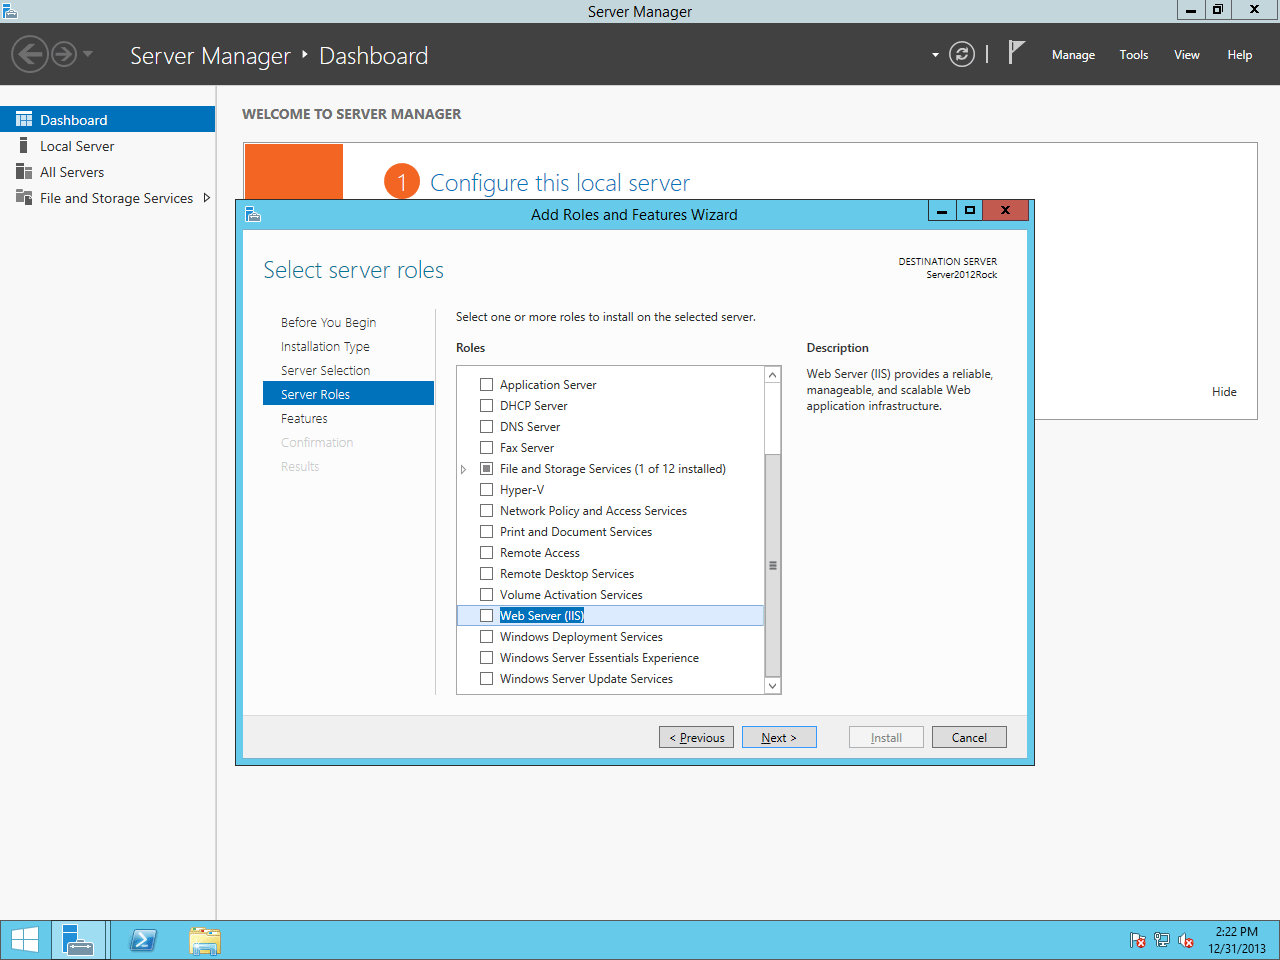
On the next screen, check the box for Web Server (IIS).
Windows Server 2008
On Windows Server 2008: when selecting the Web Server Role and clicking
Next,
you will need to add "ASP.NET" under Role Services.
Select Server Roles
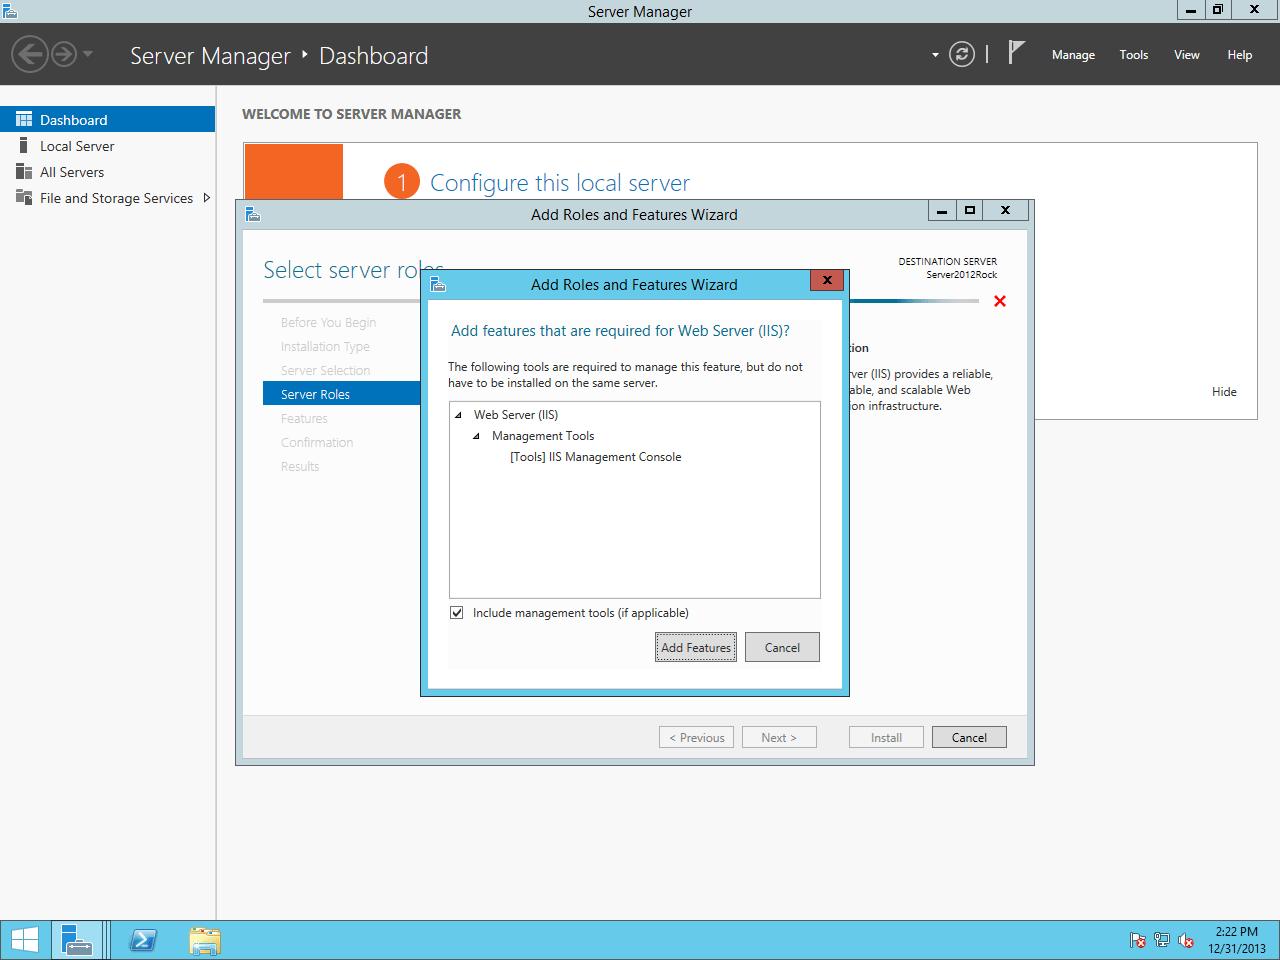
You will be prompted to add some required features for IIS. Click on Add Features. Then click Next.
Required Features Prompt
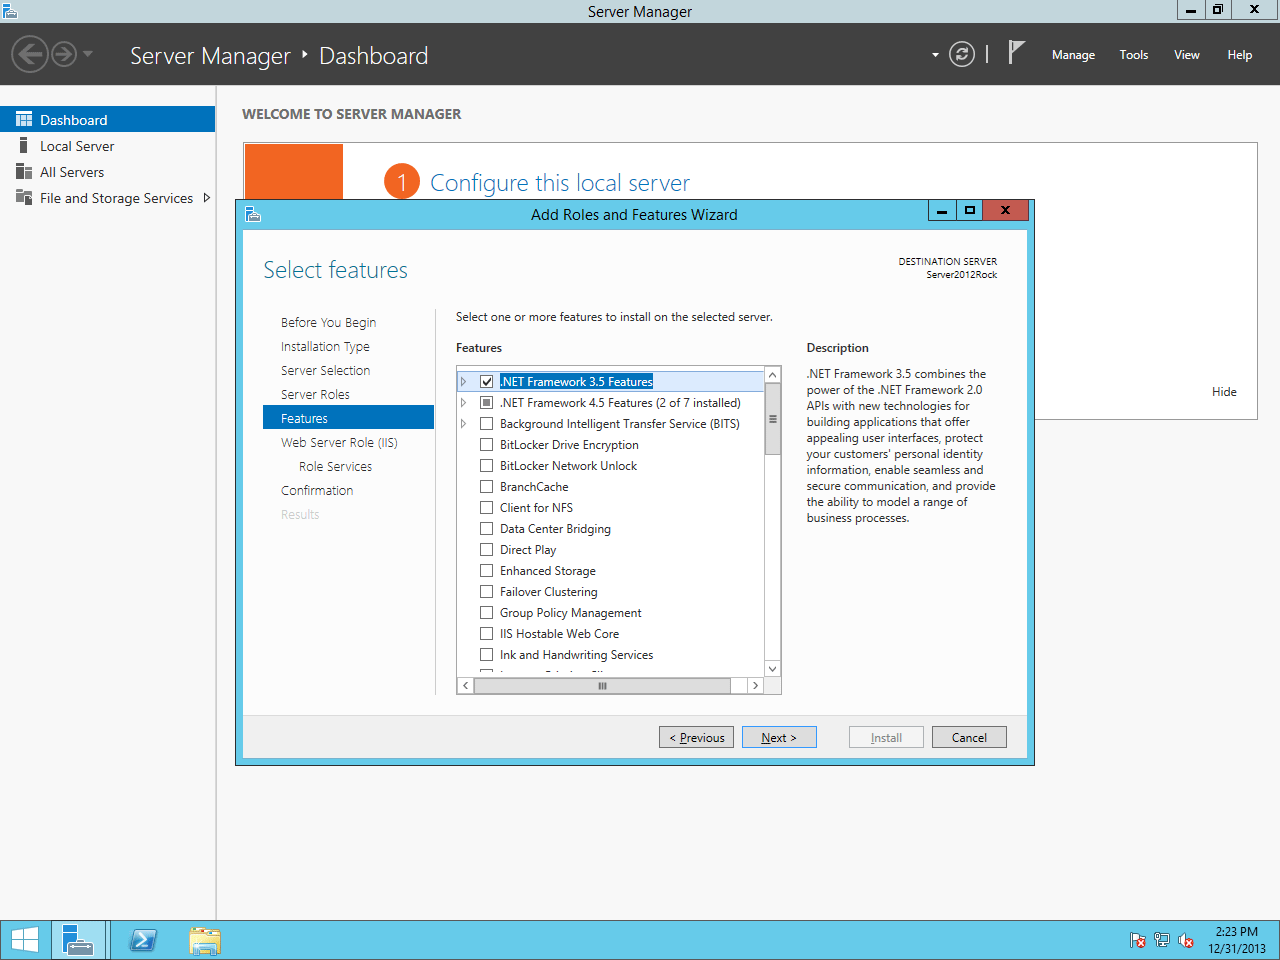
On the Select Features screen, add .NET Framework 3.5 Features and click Next.
Windows Server 2008
On Windows Server 2008: when adding features you'll need to check .NET
Framework 3.5.1 Features.
Select Features
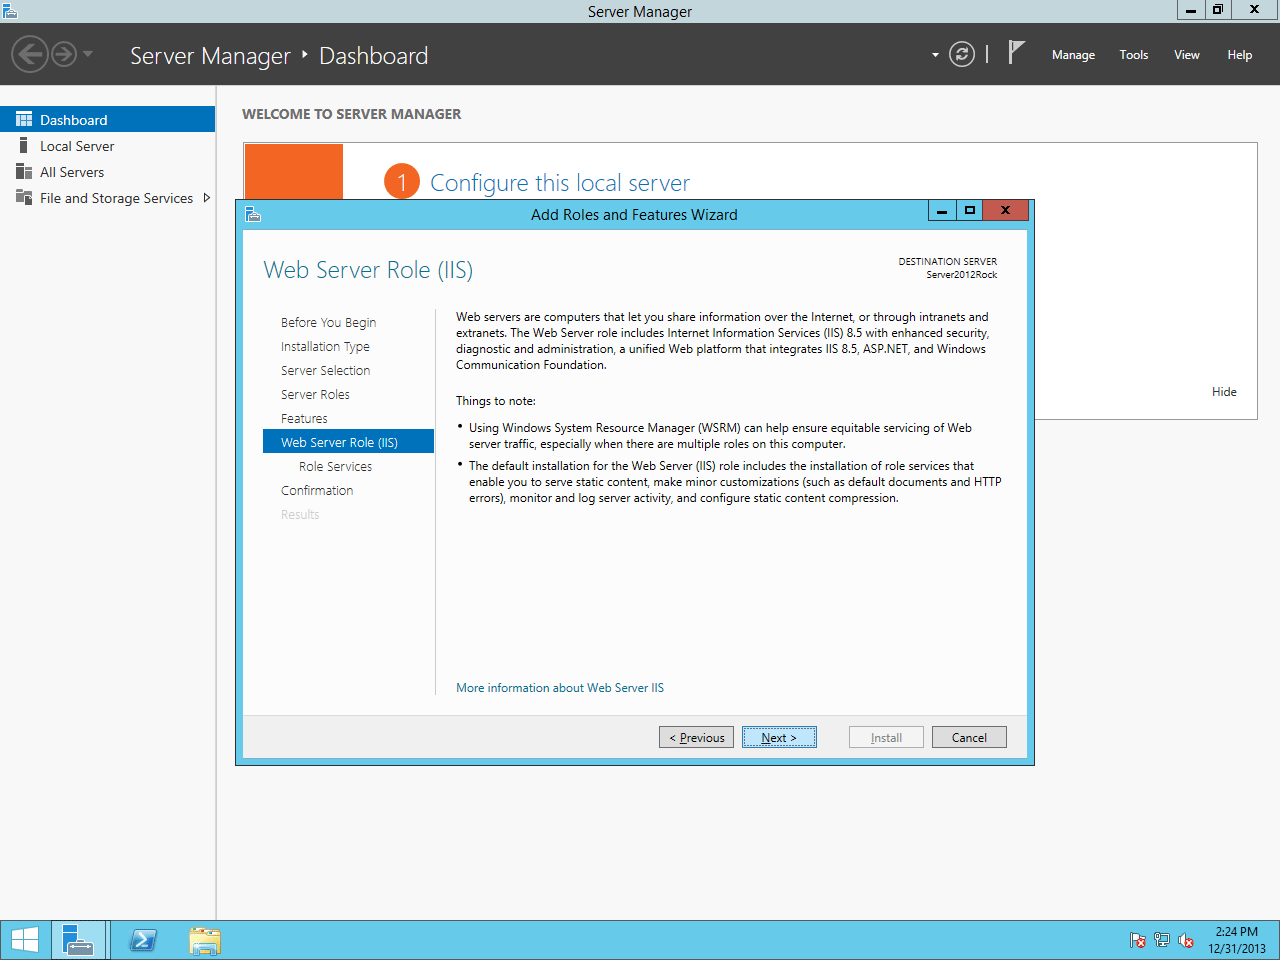
You will be presented with some information about the IIS feature. Click Next.
Web Server Role (IIS)
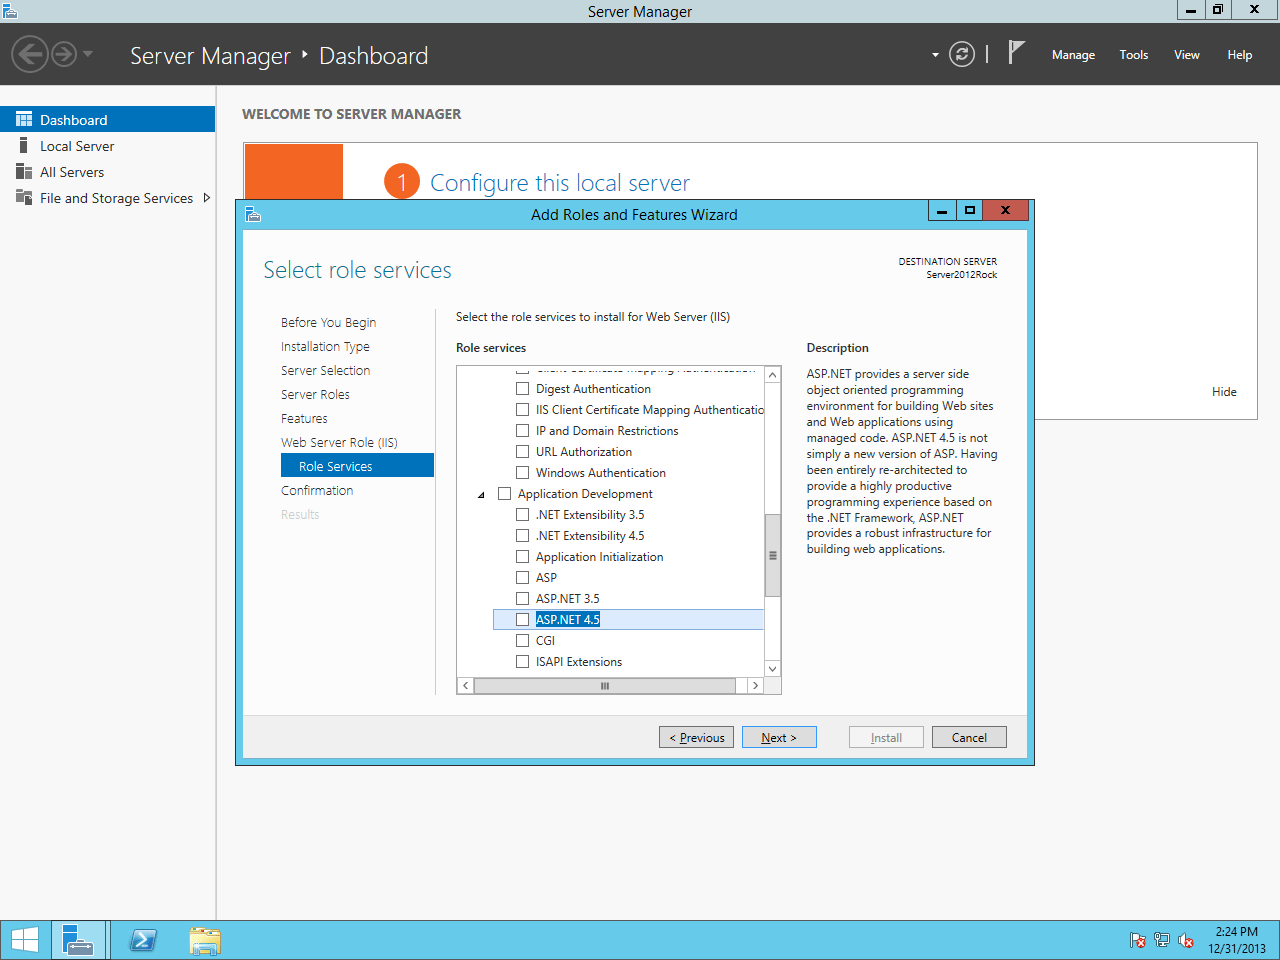
On the Select Role Services screen,
scroll down to Application Development
and check the box for ASP.NET 4.5.
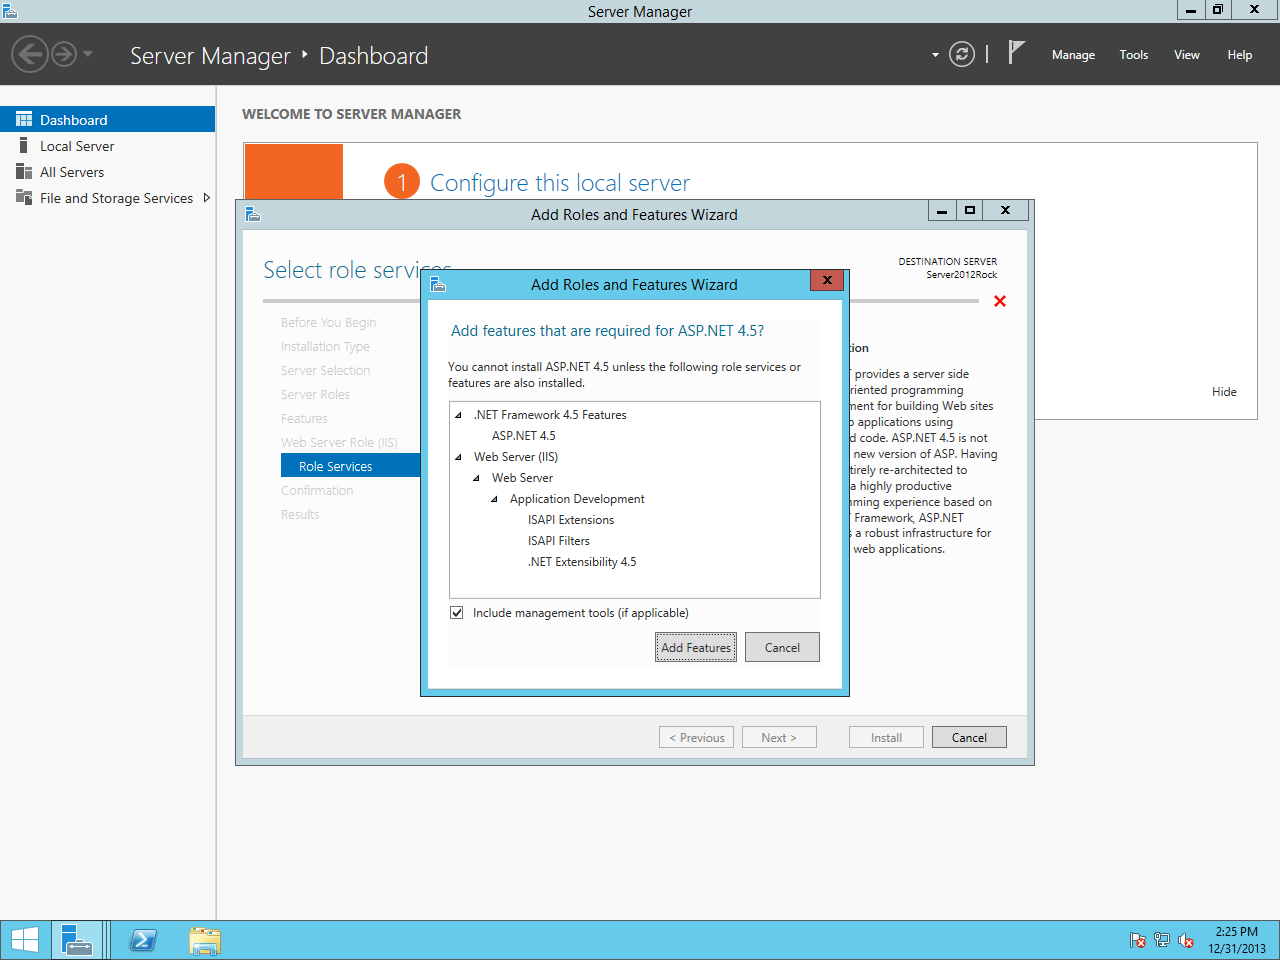
Select Role Services
You will be prompted to add some required features for ASP.NET 4.5. Click on Add Features. Then click Next.
Required Features Prompt
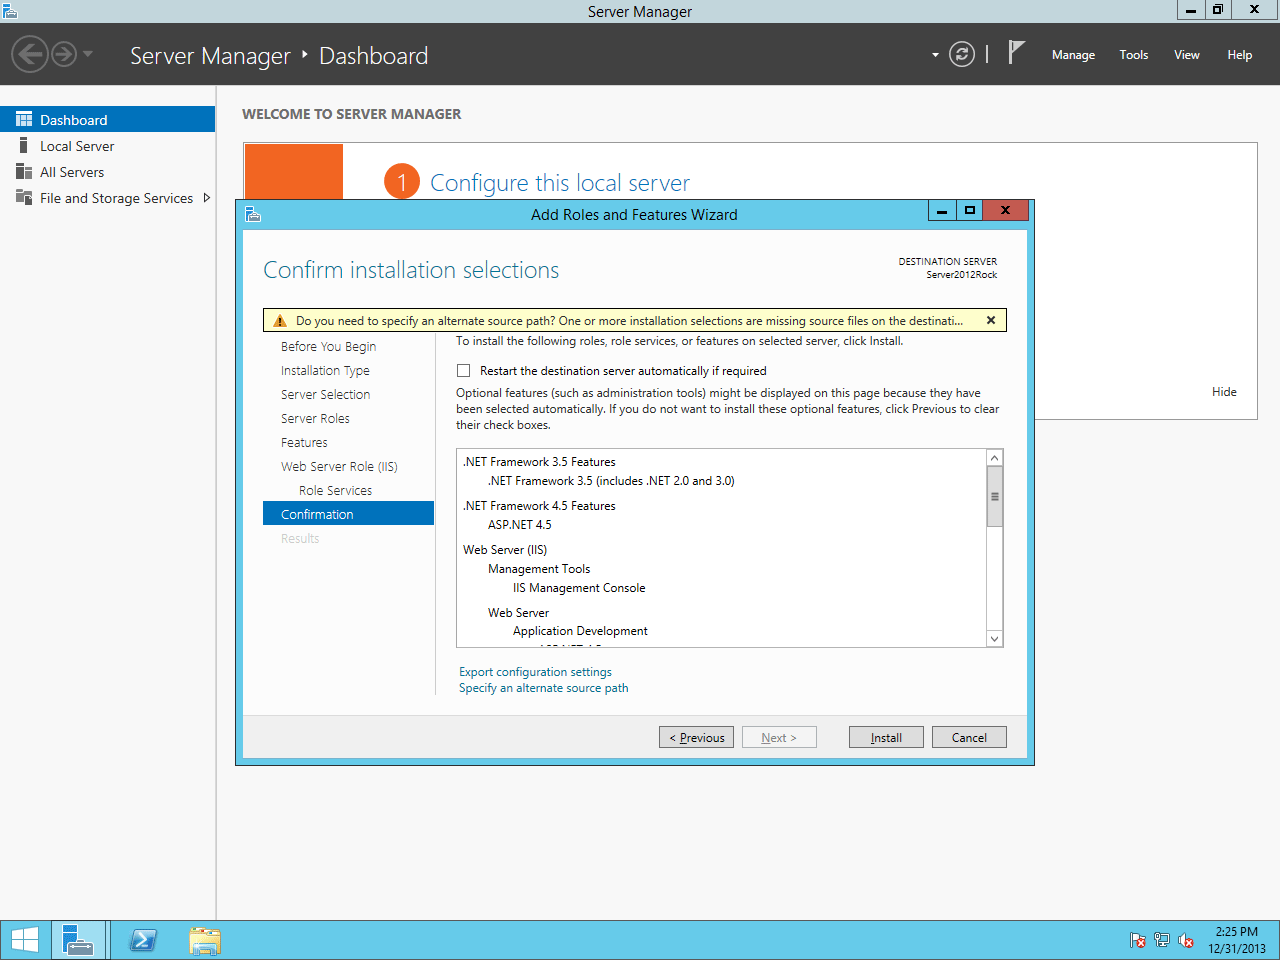
On the final screen, select Restart the destination server automatically if required and click Install.
Warning:
If this is a production server, you might not want to have the server automatically reboot.
Confirming Installation Settings
Installation will begin.
Installation Progress
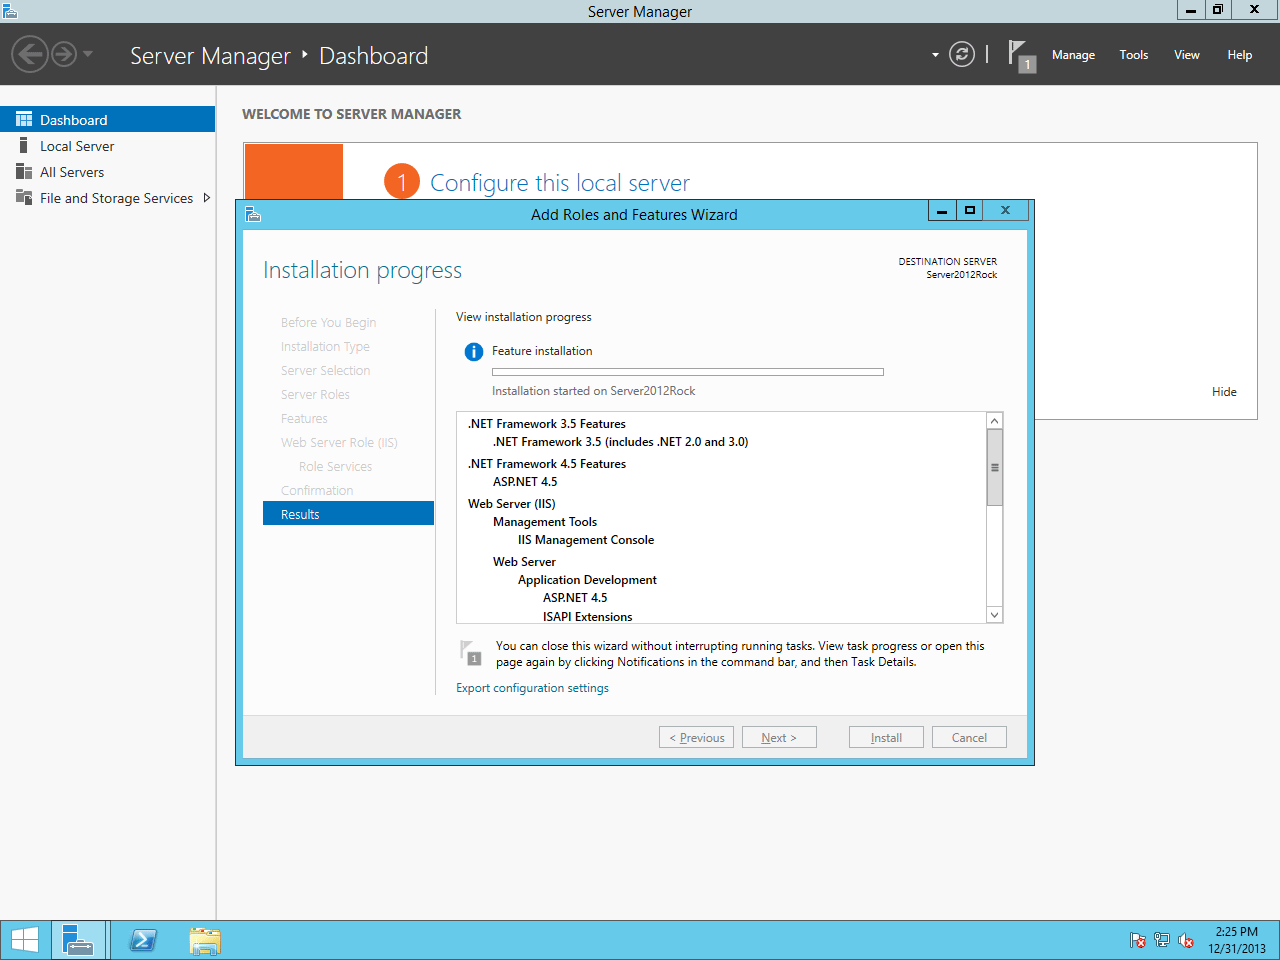
Congratulations! The web server is now installed. Let's move on to configuring Internet Information Services.
Installing & Configuring SQL Server
In this chapter we will walk through installing SQL Server. If your organization
doesn't have a SQL Server license, no worries. Rock
works great with Microsoft's free version of SQL, SQL Server Express. Please note
that SQL Server Express will work best with fewer than 20,000 records. If you
are working with more than 20,000 records, your best option would be SQL Server Web
or Standard edition.
Installing SQL Server 2016
The installation steps for SQL Server 2016 are an almost exact match to those below for version 2012.
Getting SQL Server Express
To download SQL Server Express, Click Here.
SQL Server Express comes in different editions. The version we recommend is the 64-bit
version of SQL Server Express with Tools. This version includes the management tools
you need to set up the Rock database. Once you have SQL Server downloaded,
let's move on to the next section.
Installing SQL Server
In this section, we will be installing SQL Server onto our Rock server. Let's begin.
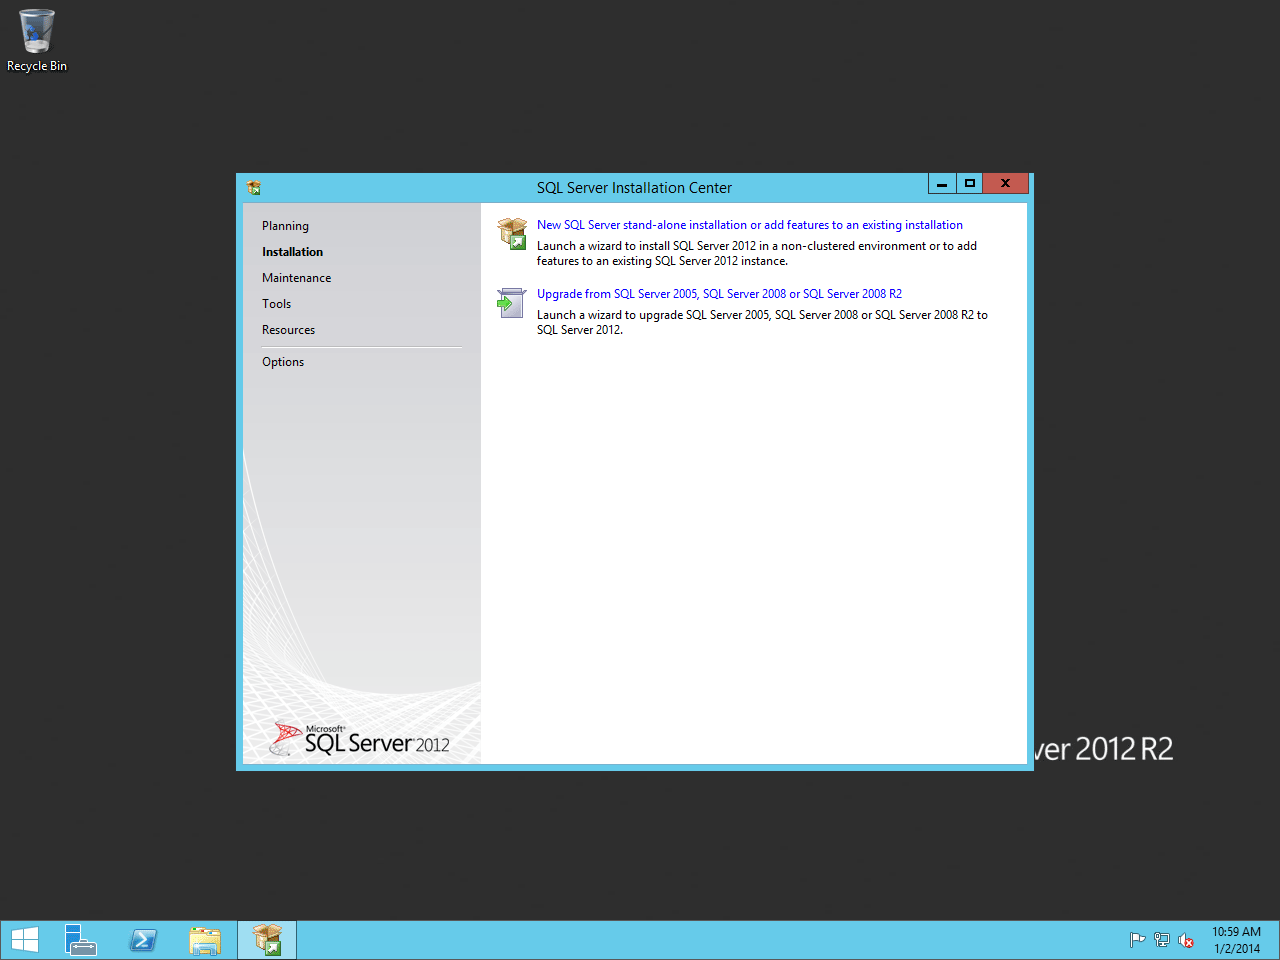
Start the SQL Server installer and on the first screen click on New SQL Server stand-alone installation or add features to an existing installation.
SQL Setup
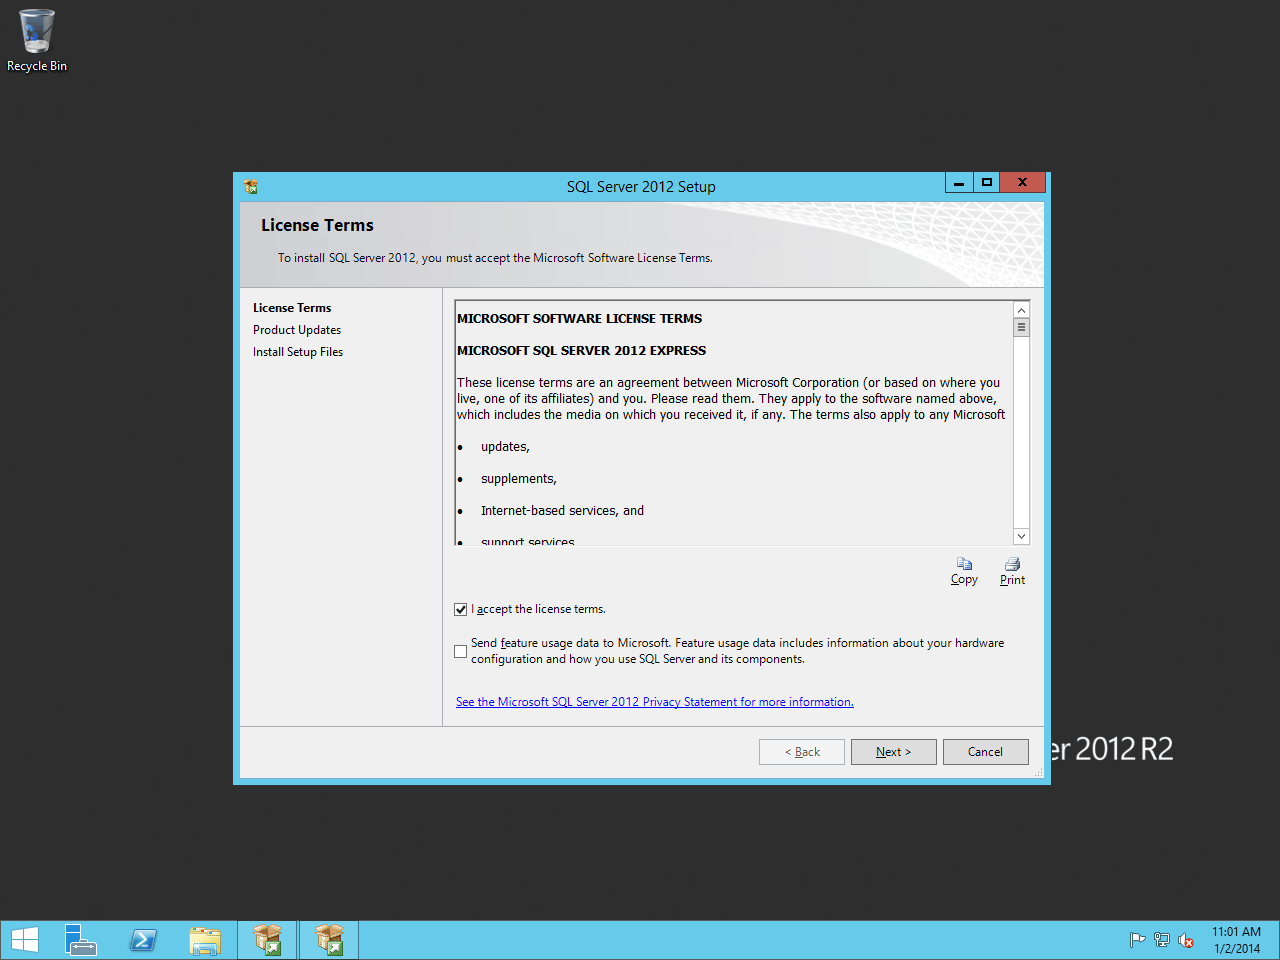
On the next screen, agree to the license agreement and then click Next.
License Agreement
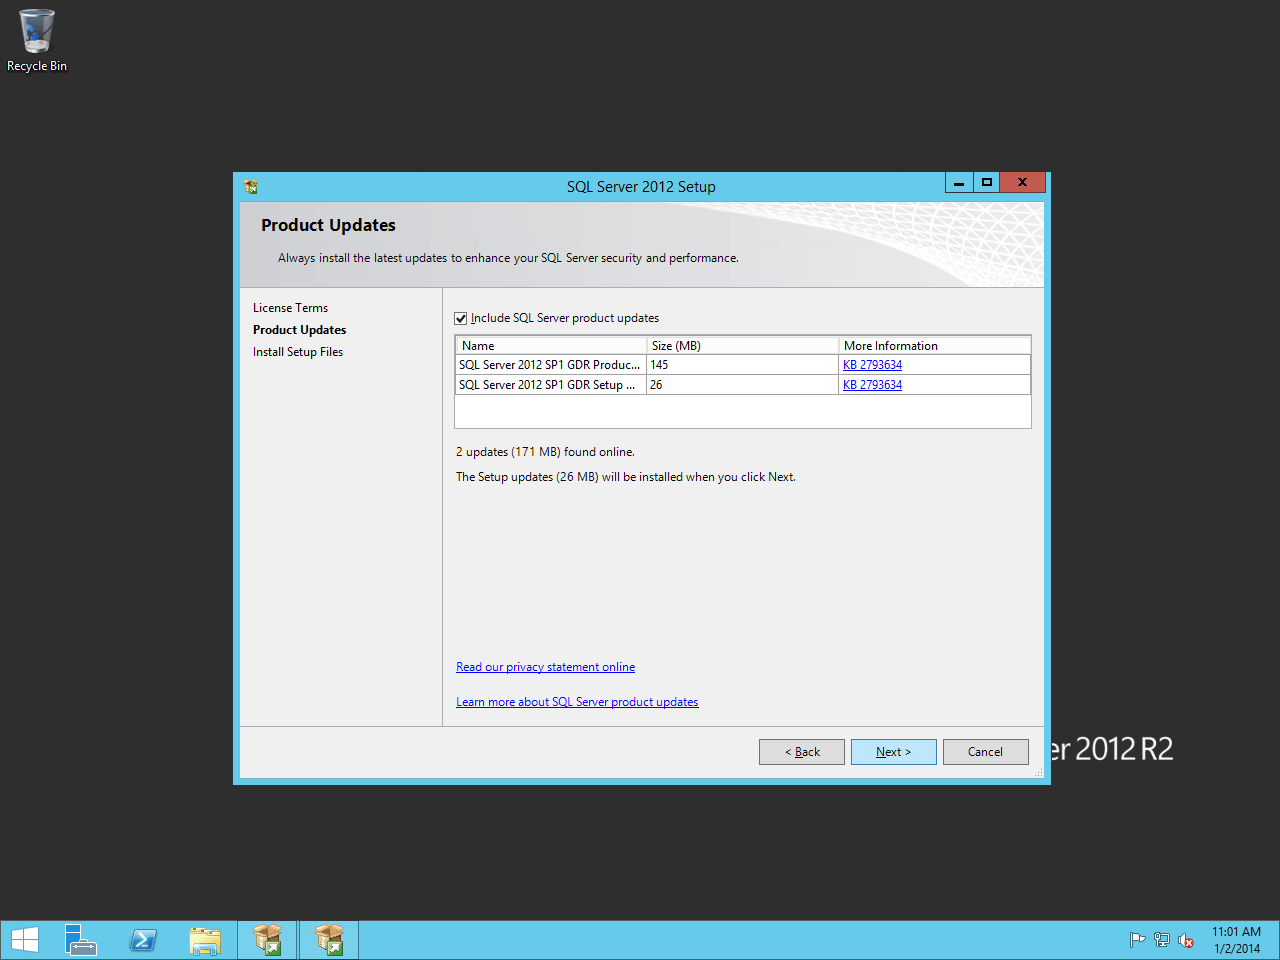
Keep the Include SQL Server Product Updates checkbox checked and click Next.
Product Updates
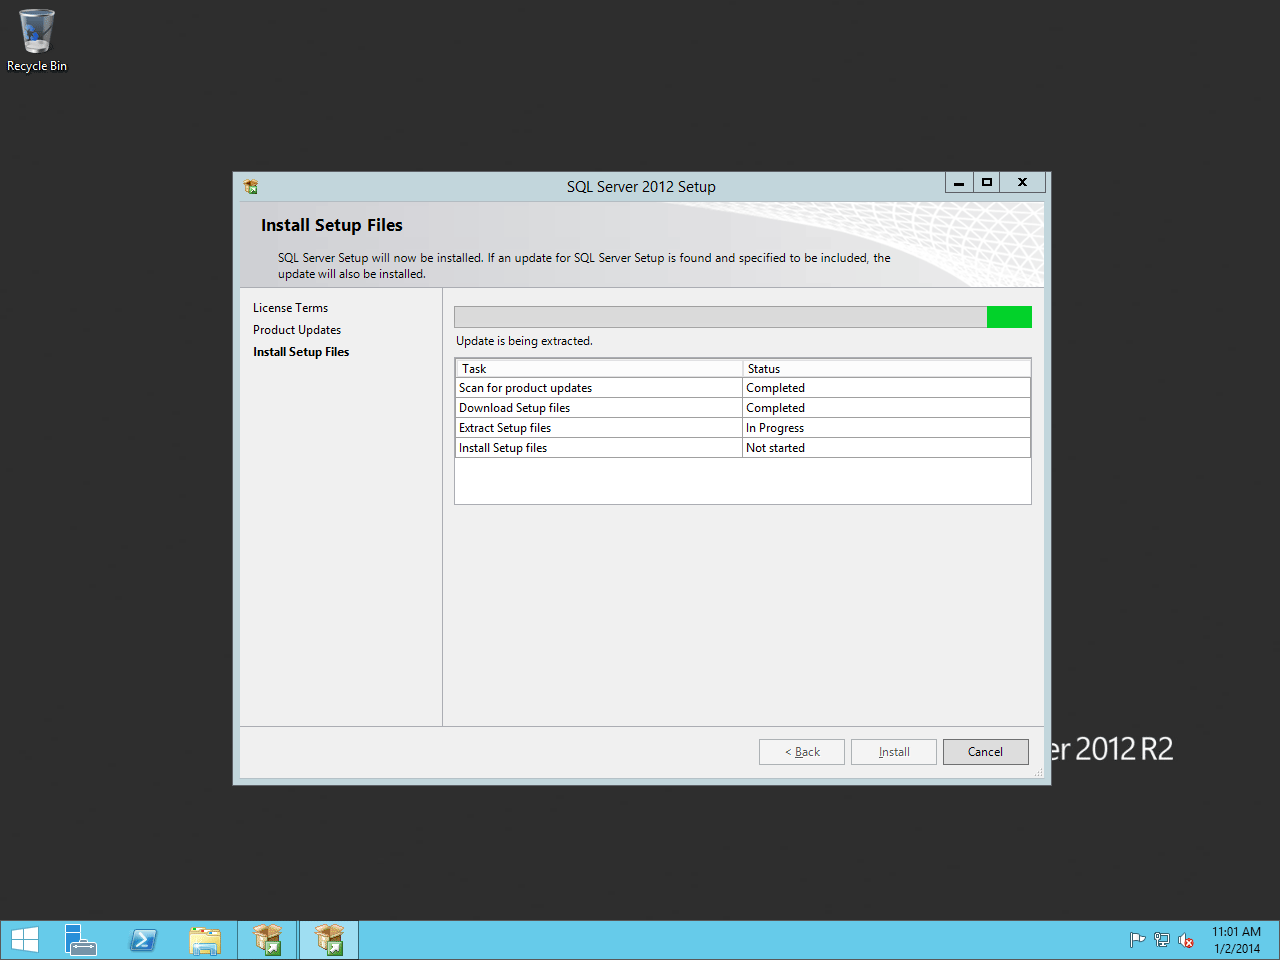
Next, the SQL installer will prepare to set up.
Installing Setup Files
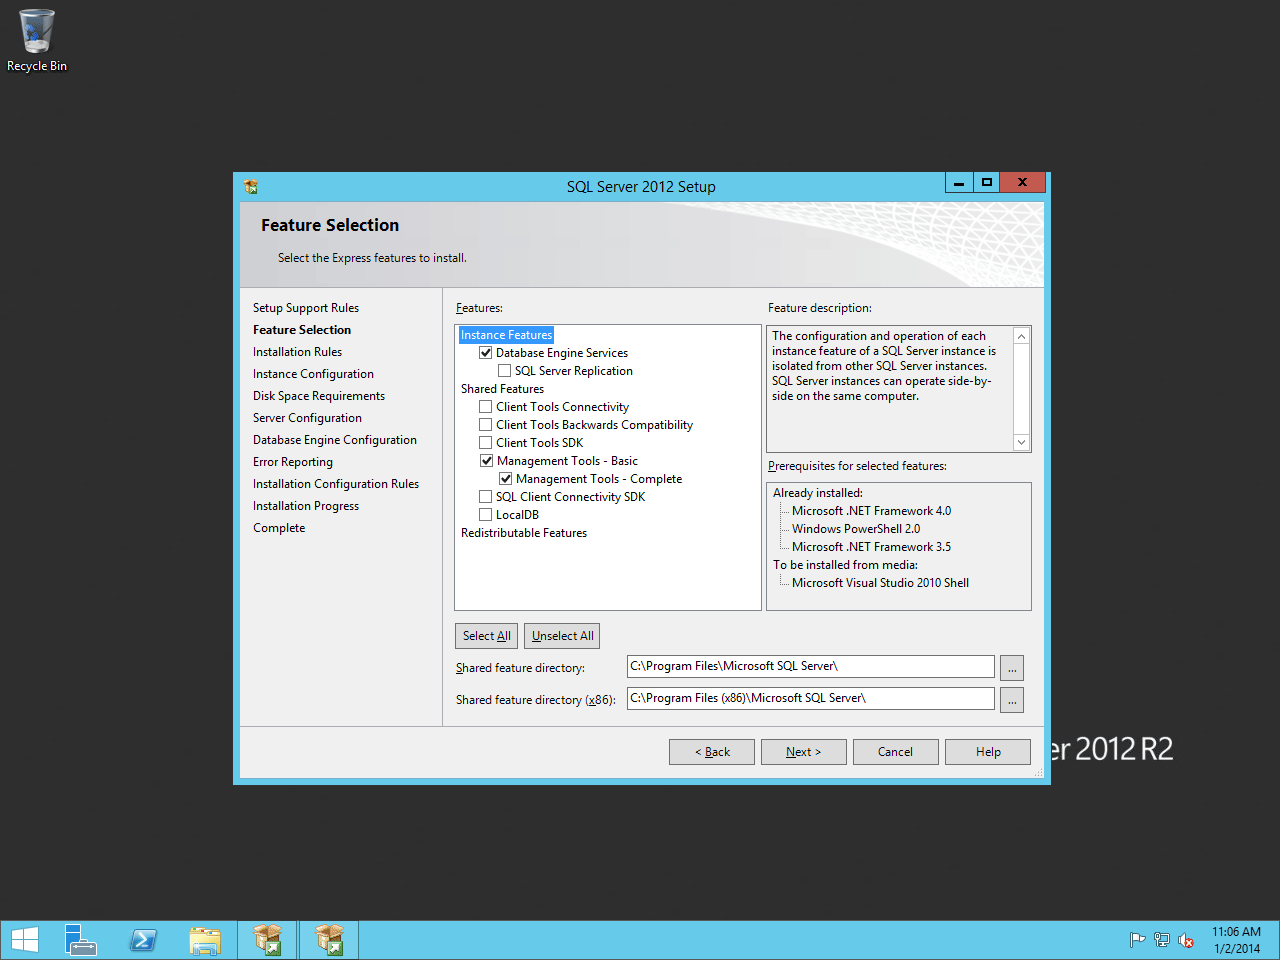
On the Feature Selection screen, we recommend using the settings
shown in Figure 4.8. These are the minimum required settings
needed for Rock. Click Next to continue.
Feature Selection
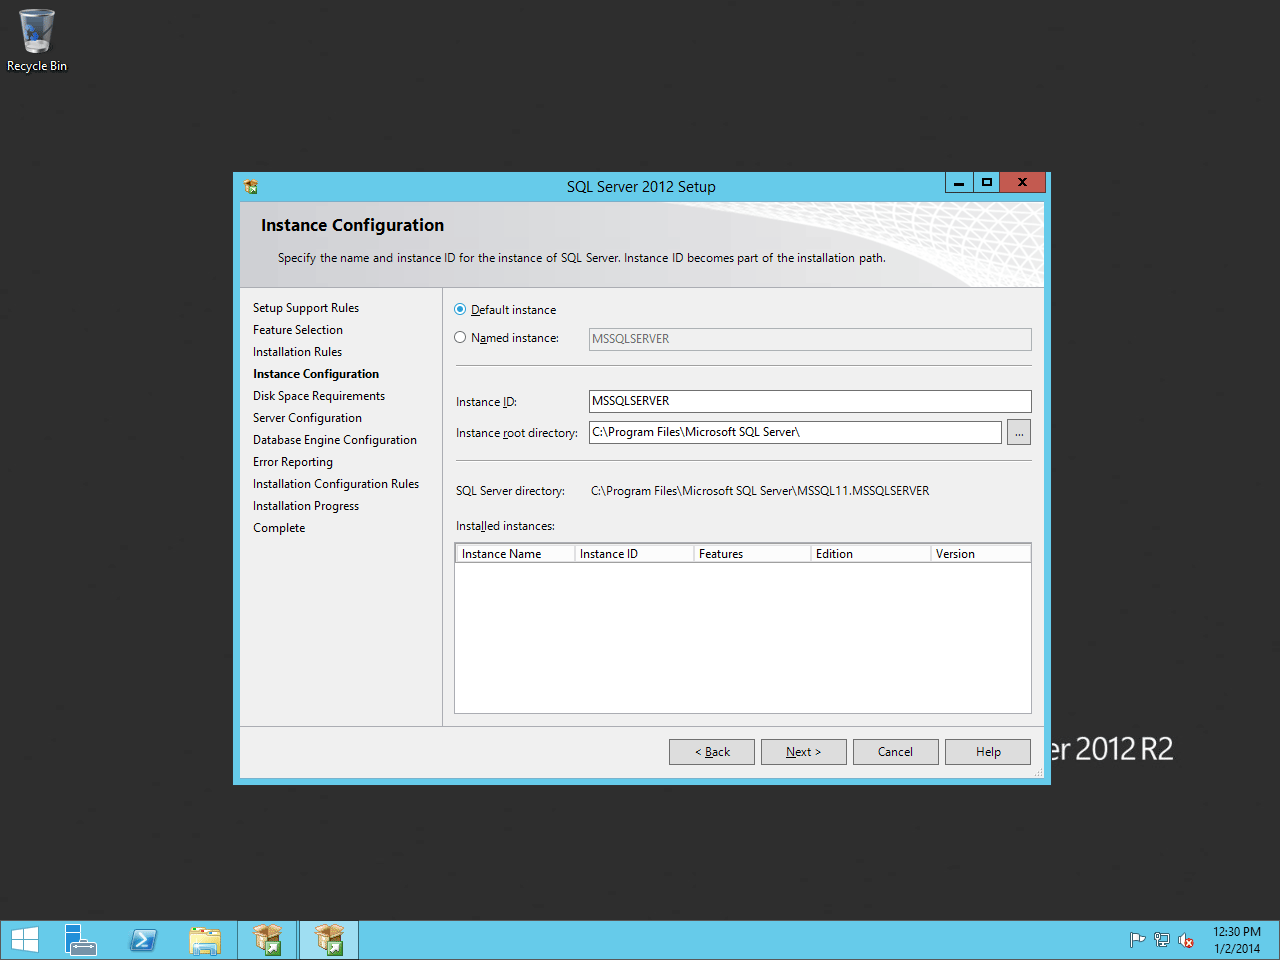
On the Instance Configuration screen, click on the Default Instance button. Click Next.
Warning
Be sure to use Default Instance if you are unfamiliar with SQL Server. This
will simplify our Rock setup. We only recommend using Named Instances if
you are familar with them.
Instance Configuration
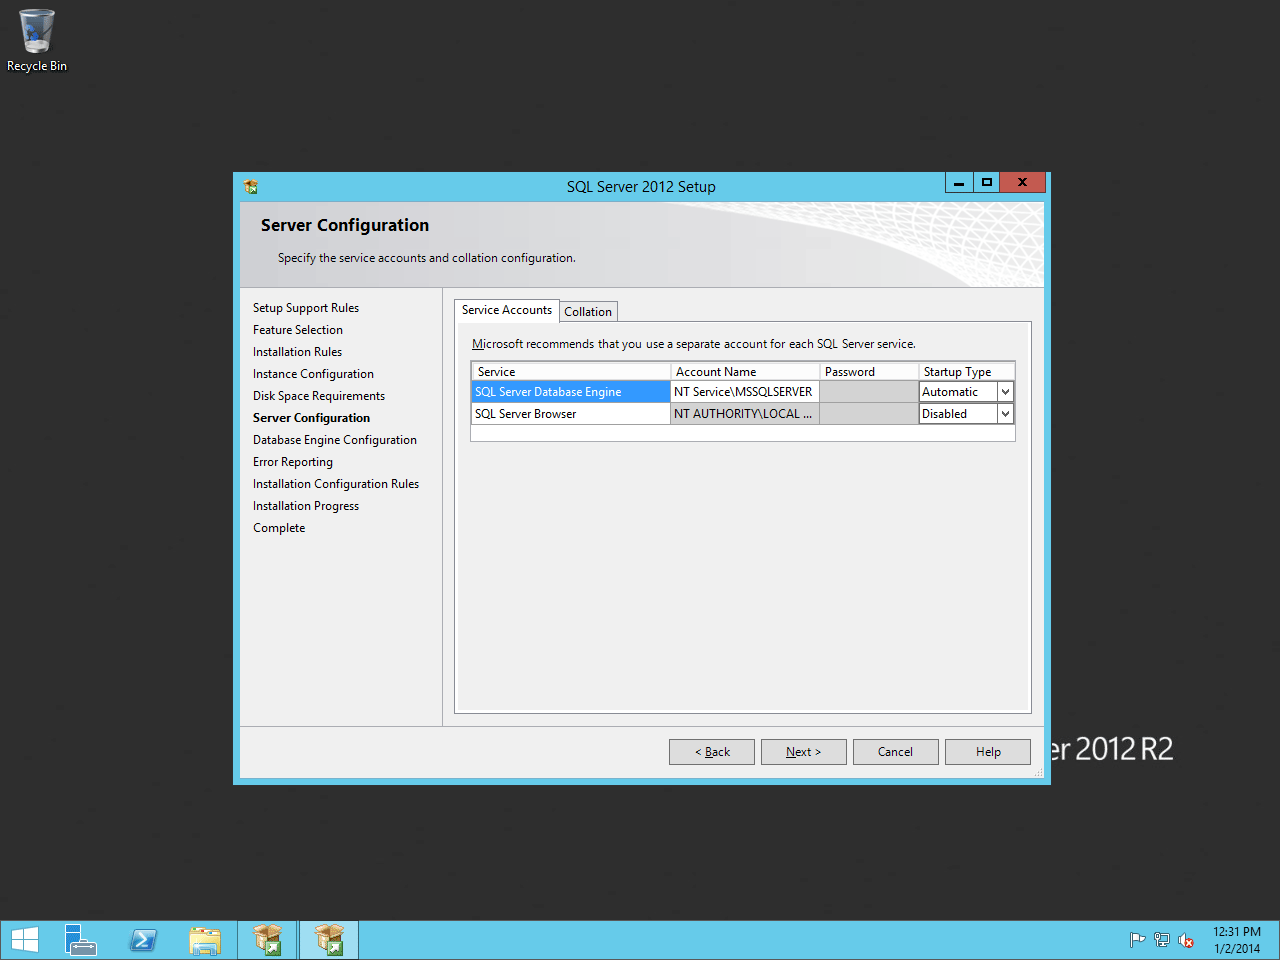
Leave the default settings on the Server Configuration screen and click Next.
Server Configuration
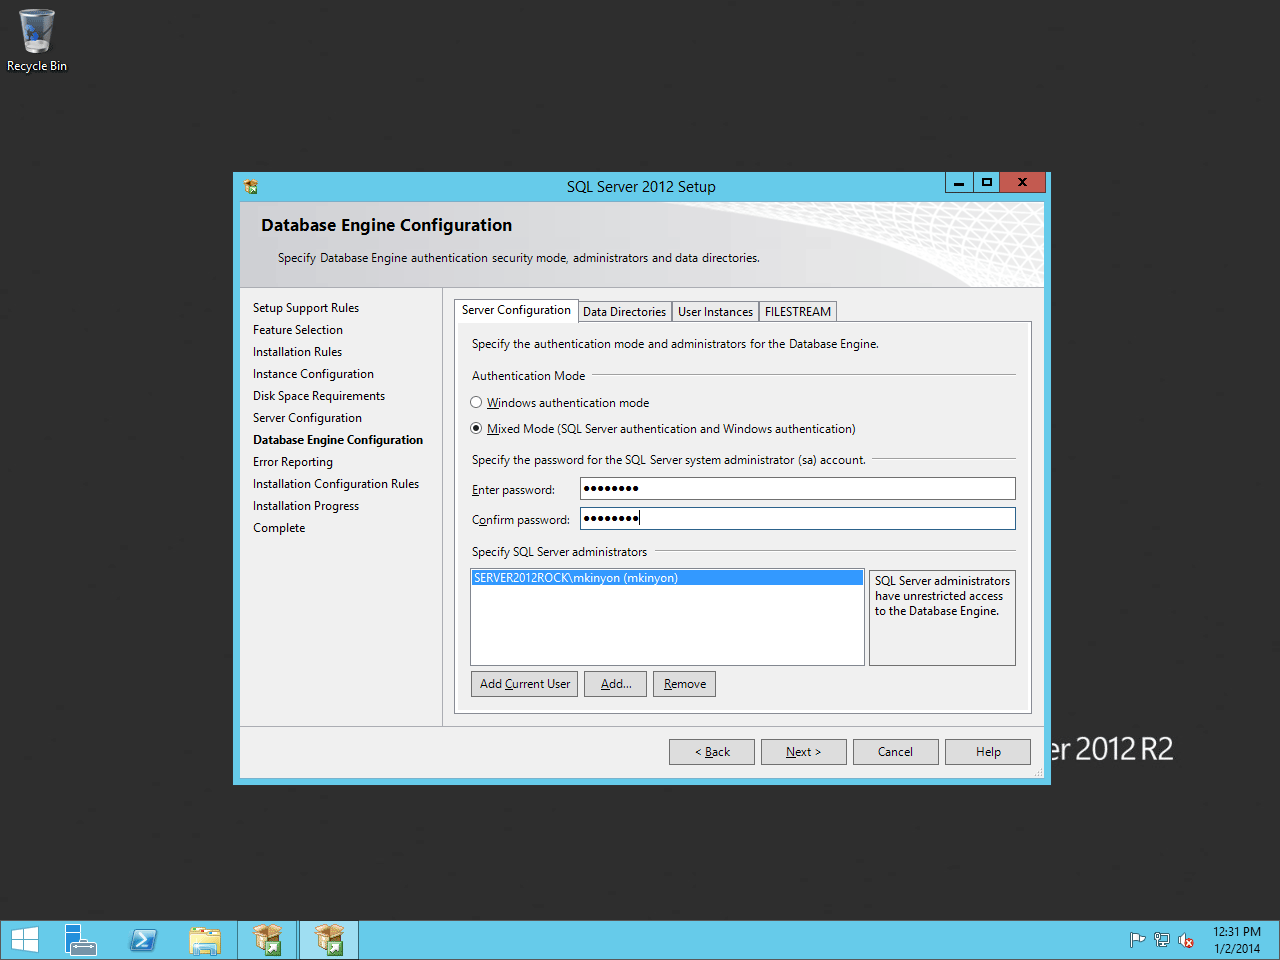
On the Database Engine Configuration screen, set the Authentication Mode to Mixed Mode and set a password for SQL Server. Click Next.
Note:
Keep this password handy since it will be needed later to set up the Rock RMS database.
Database Engine Configuration
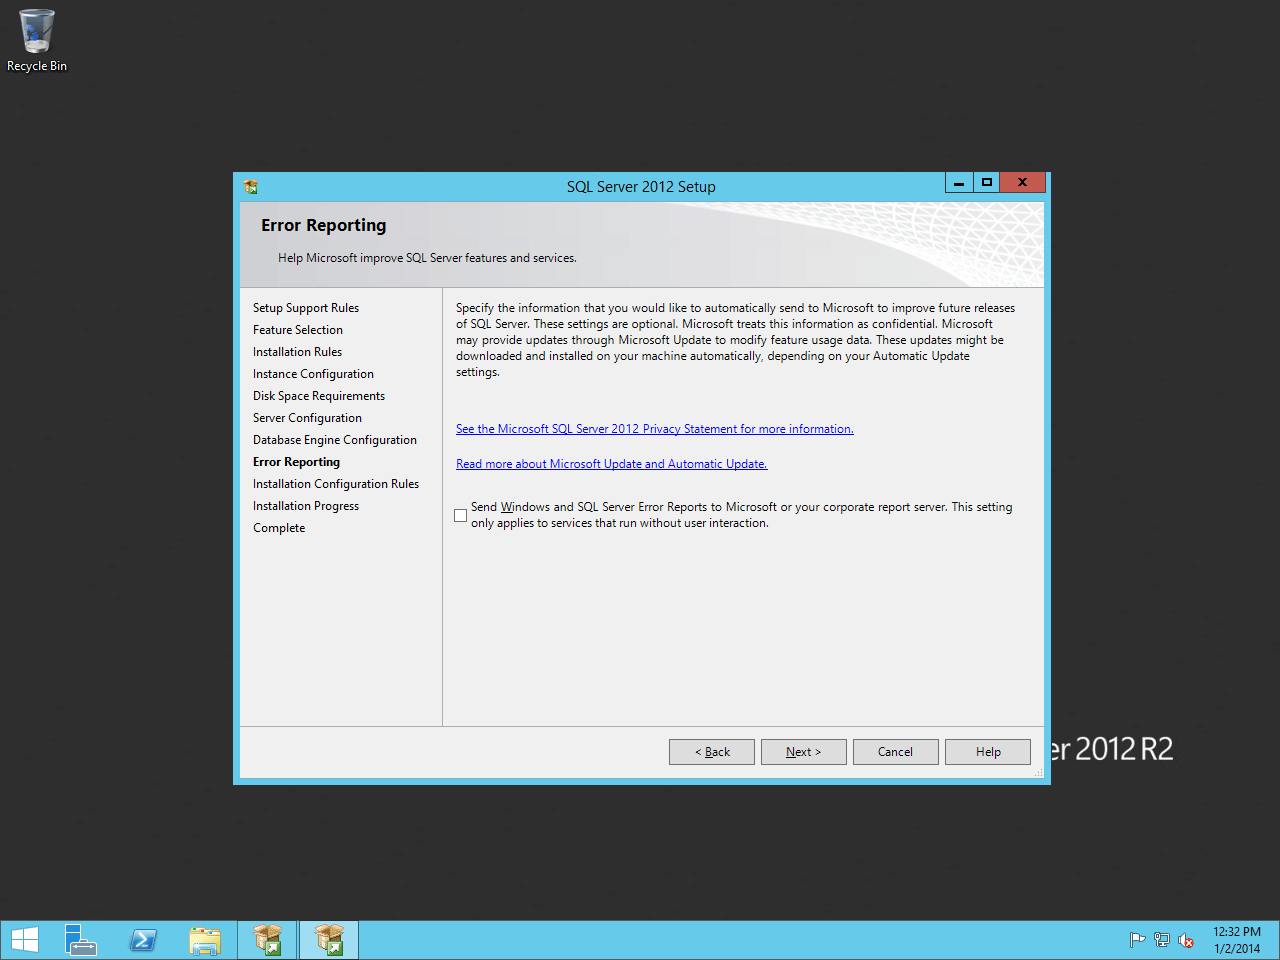
Skip past the Error Reporting unless you would like to send Microsoft error reports. Click Next.
Error Reporting
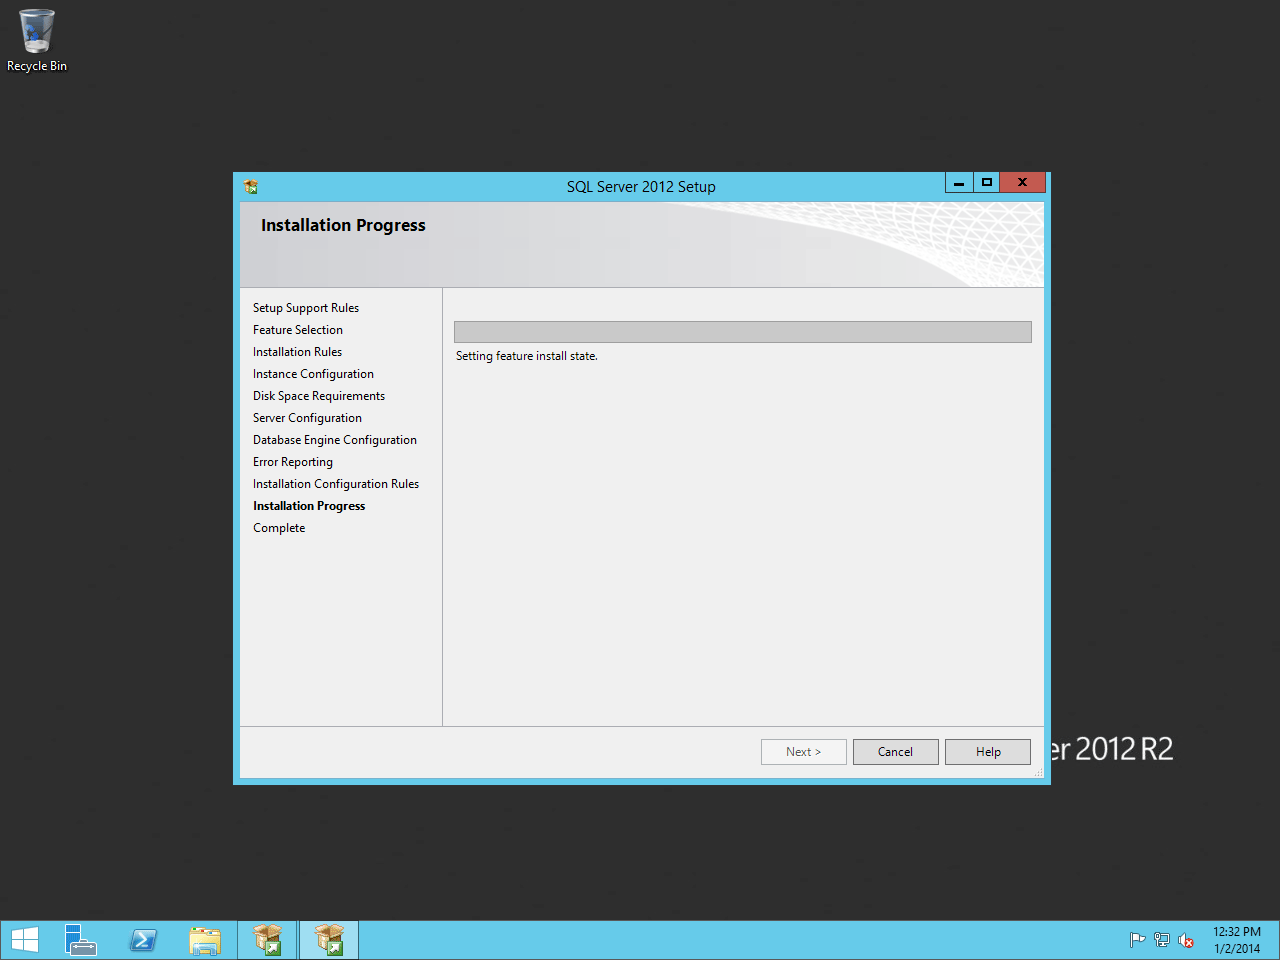
Installation will begin, so hold tight.
SQL Server Installing
When complete, close the installer.
Installation Complete

Configuring SQL Server
In this section, we will be setting up a user account for Rock to
use to access the SQL Server. To begin, let's open the SQL Server
Management Studio and log in using the credentials we created during
the SQL Server installation.
Note:
By default, the admin username for SQL is “sa”. Use that username when logging in for the first time.
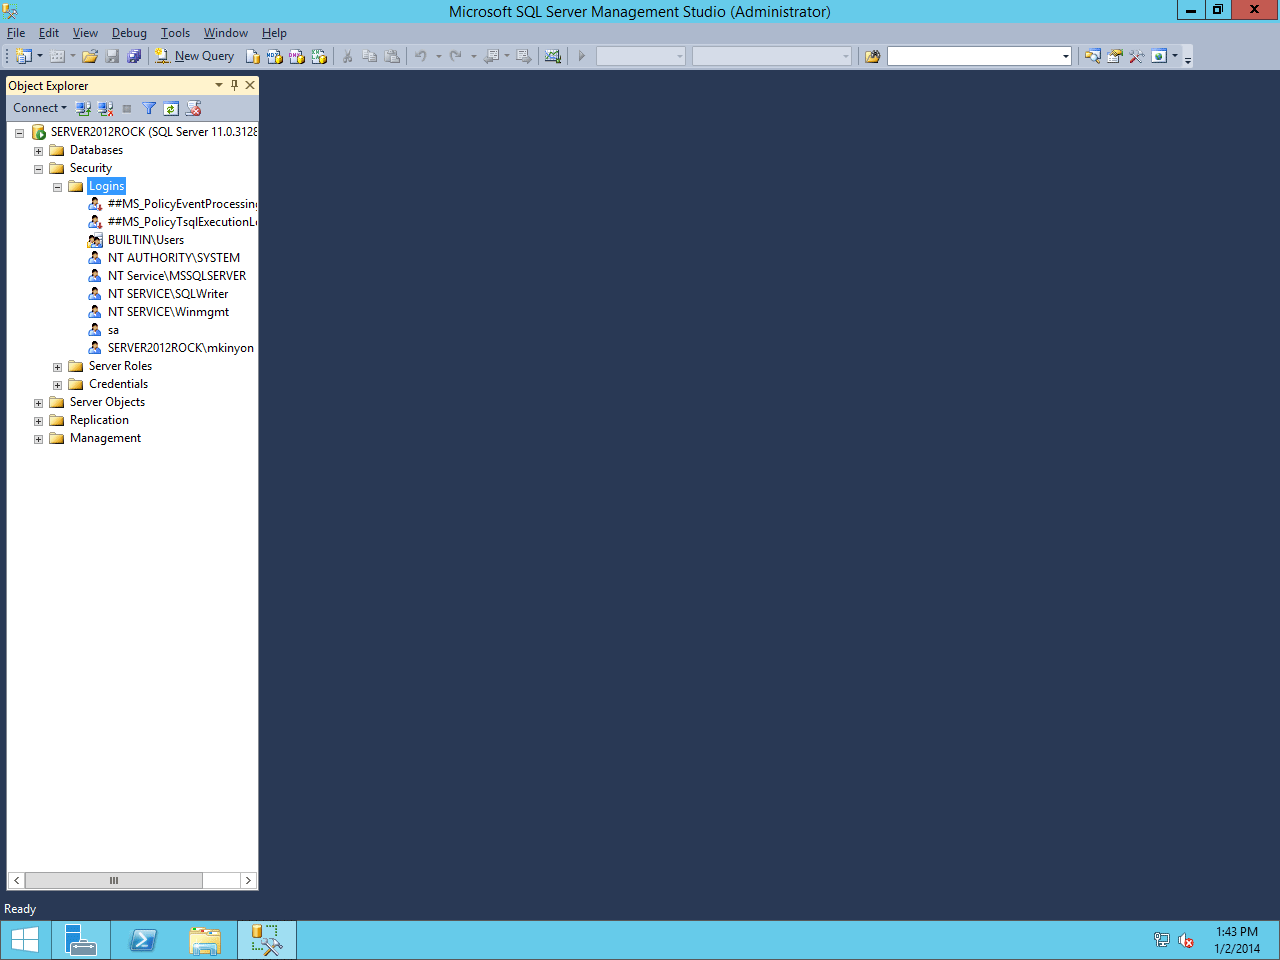
On the Object Explorer, expand the Security folder and right click on Logins and click on New Login.
Object Explorer
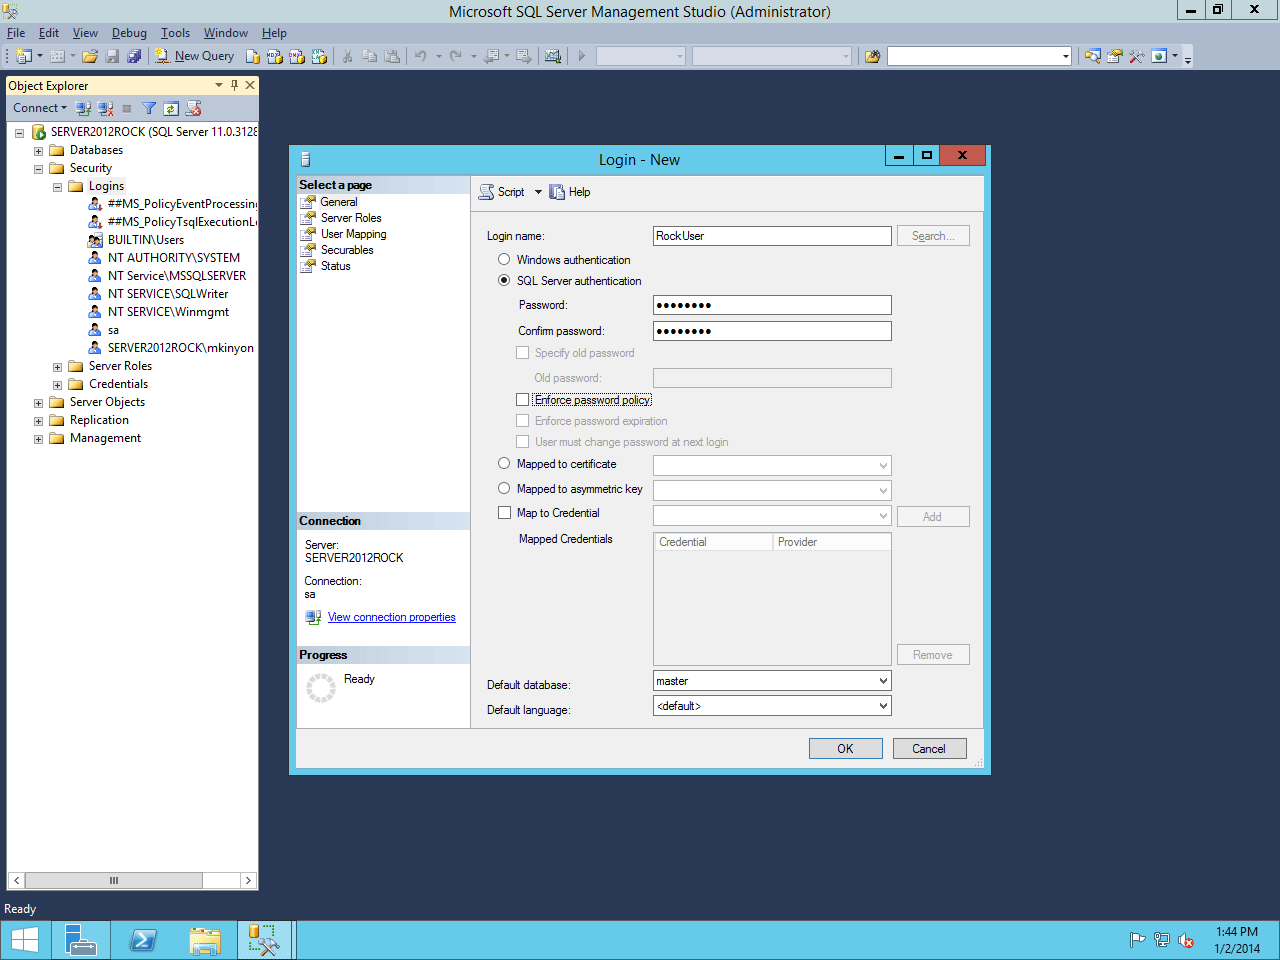
Create a user called RockUser (or another username if you prefer) and create a password. Also, uncheck the Enforce password policy setting for this account.
New User Window
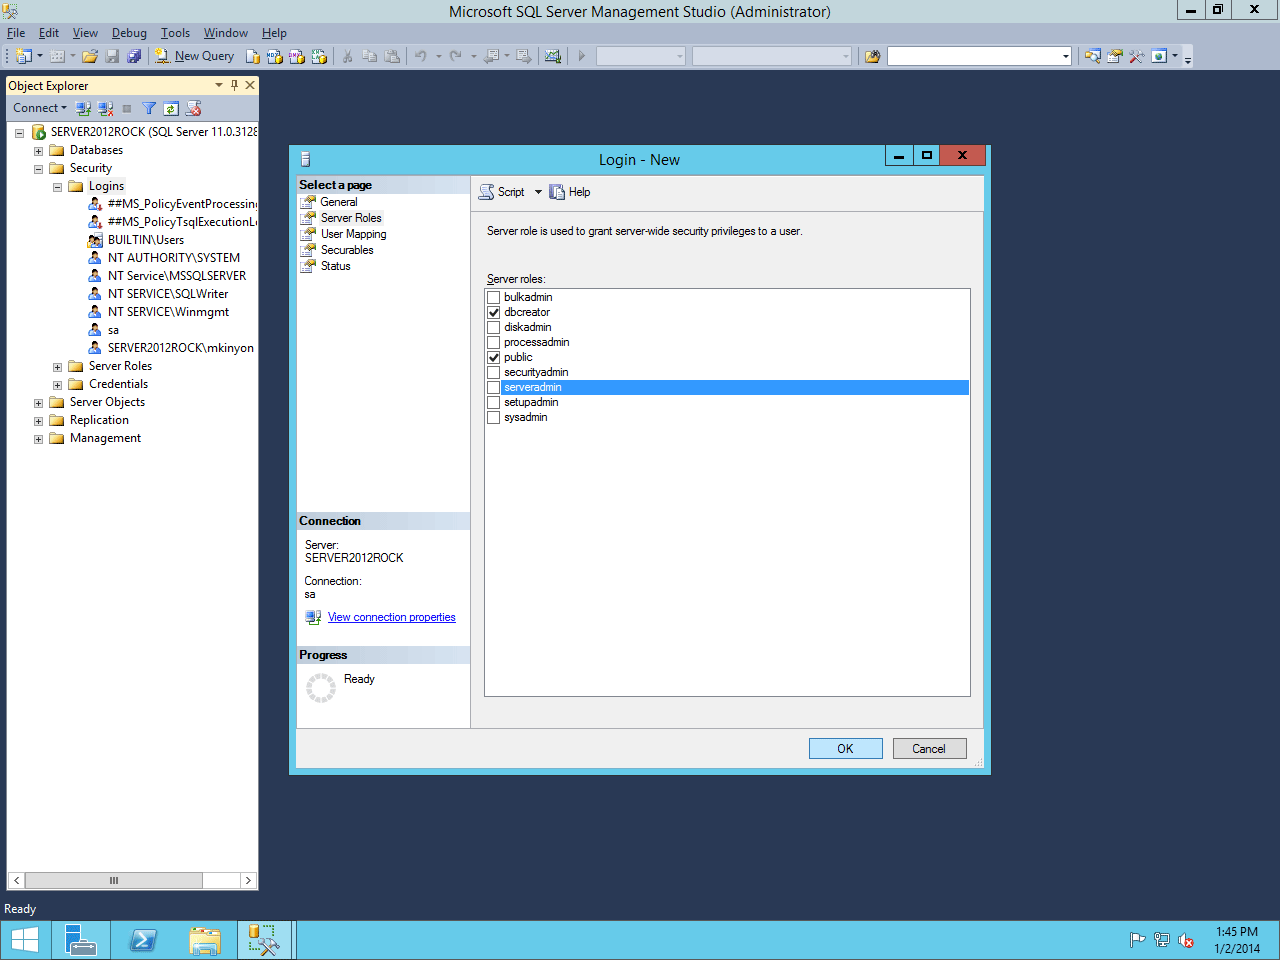
Next, click on Server Roles. Check the dbcreator role. Then click OK.
Login Properties
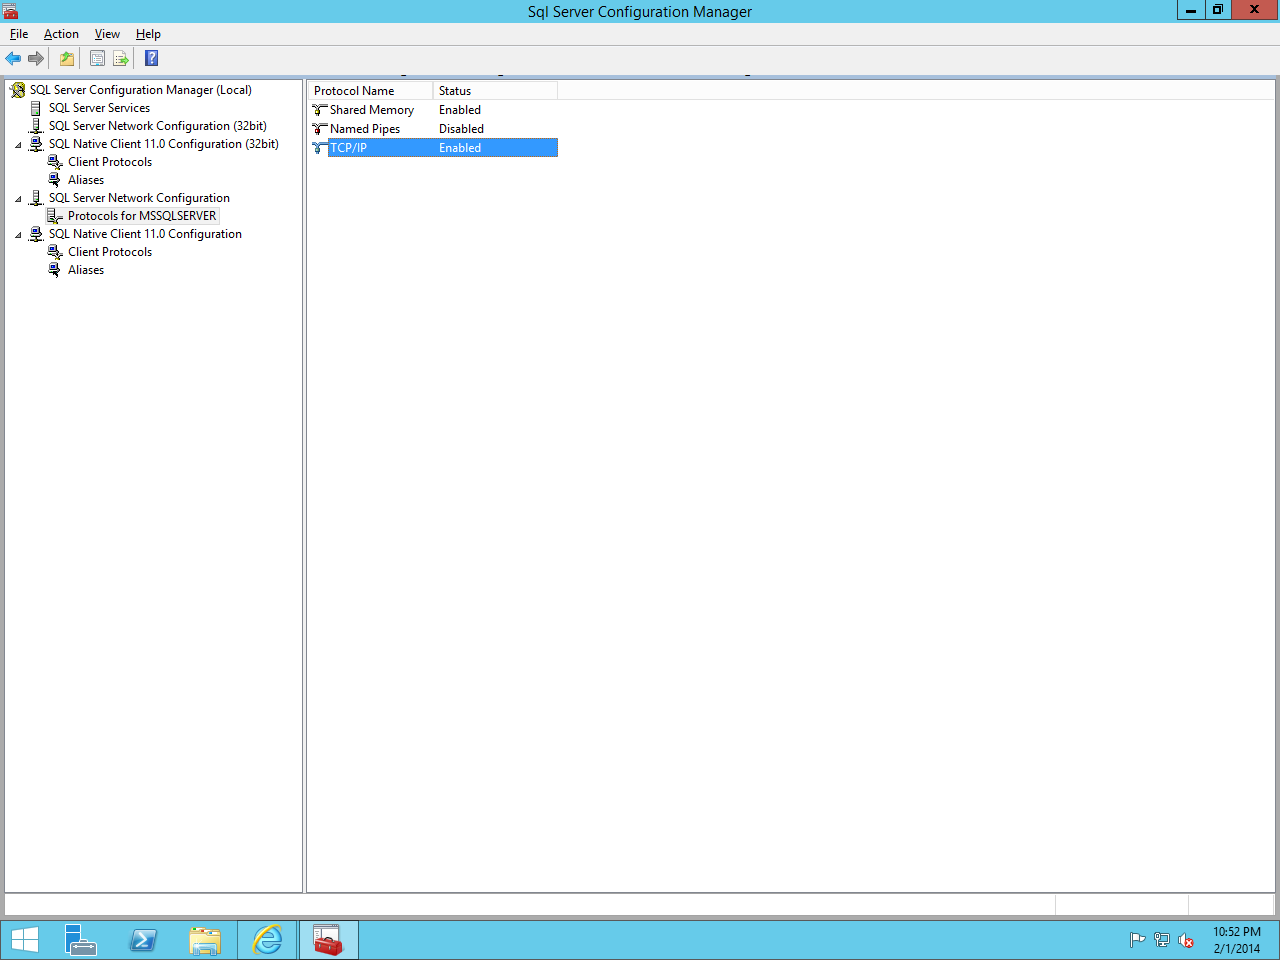
Now let's open up SQL Server Configuration Manager.
Expand the SQL Server Network Configuration item and click on Protocols
for MSSQLSERVER. Right click on TCP/IP and click on Enable.
Enabling TCP/IP
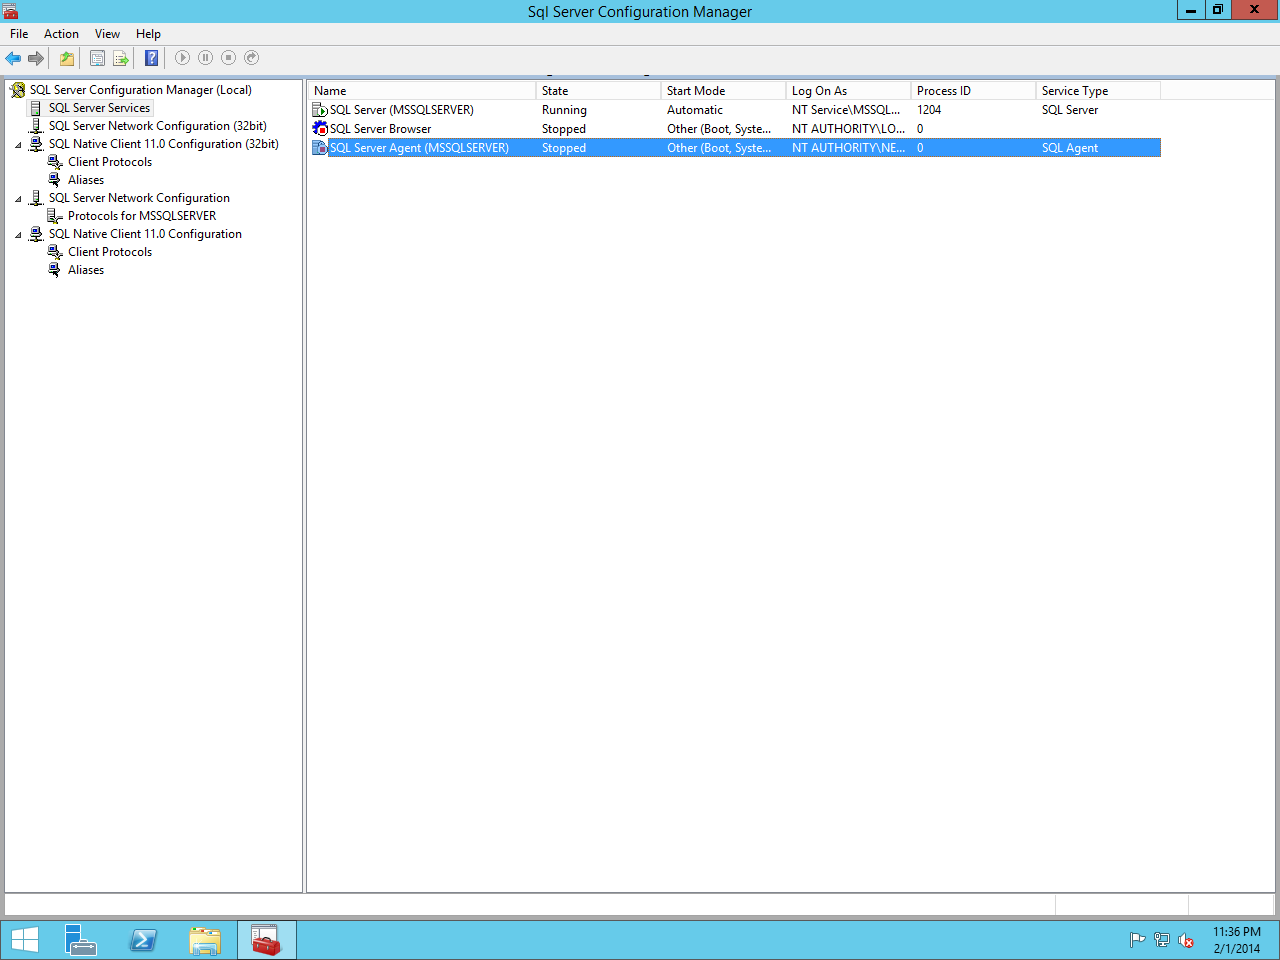
Next, click on SQL Server Services and then right click on SQL Server Agent (MSSQLSERVER)
and click on Properties.
SQL Server Services
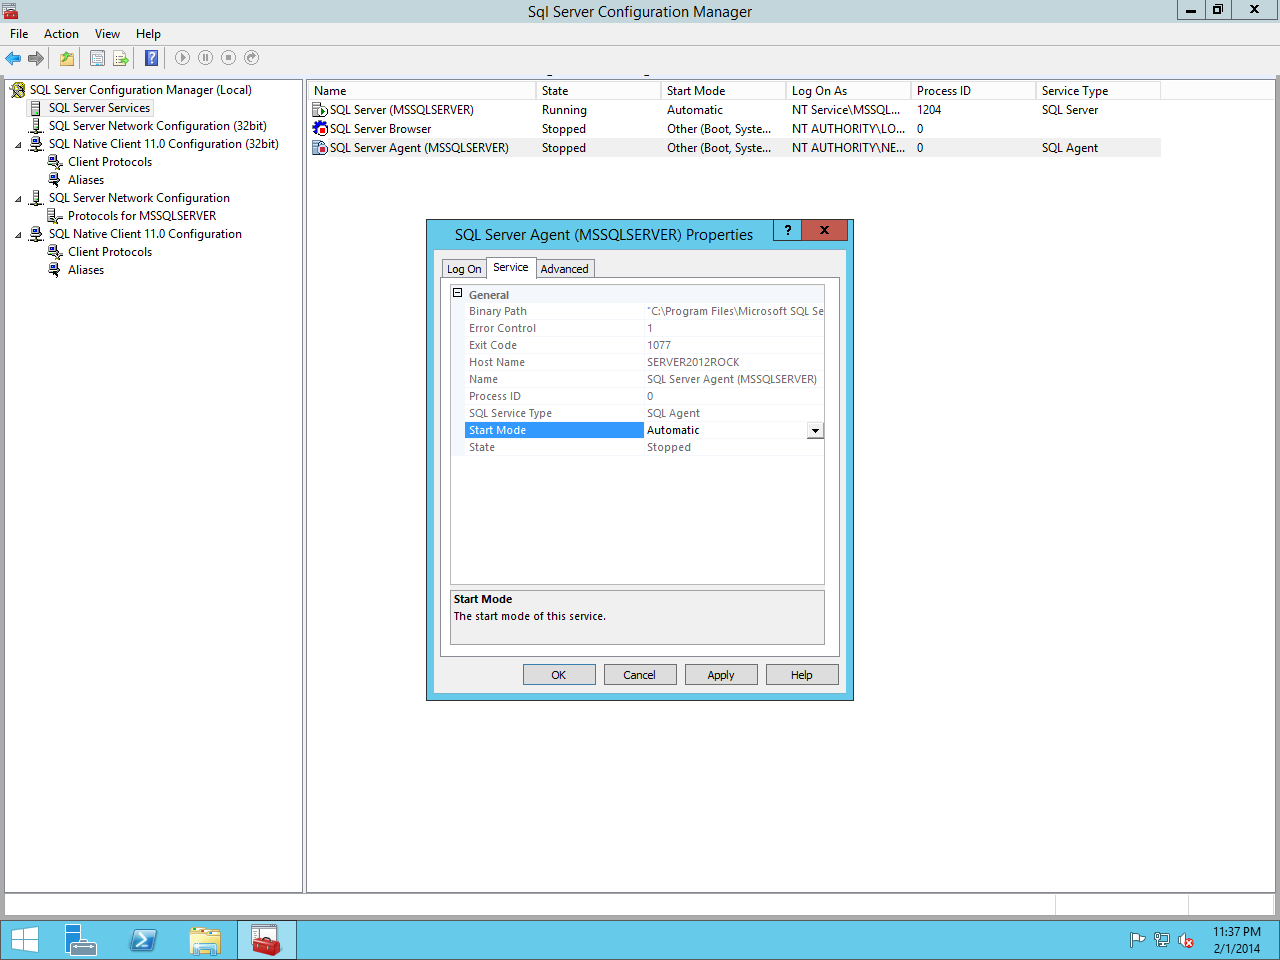
Set the start mode to Automatic and click on Apply.
SQL Server Agent Properties
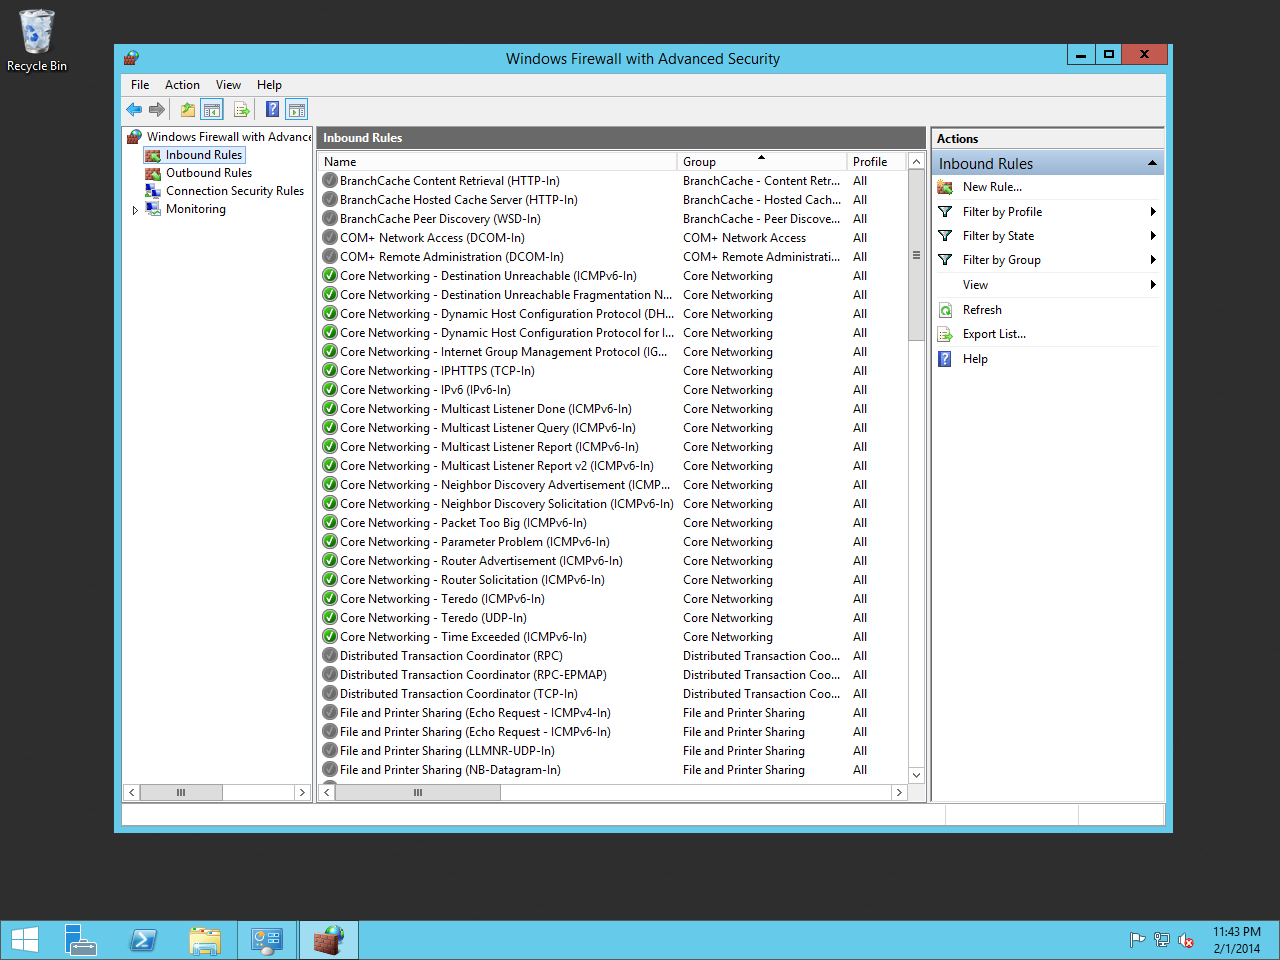
Next, let's open up Firewall with Advanced Security.
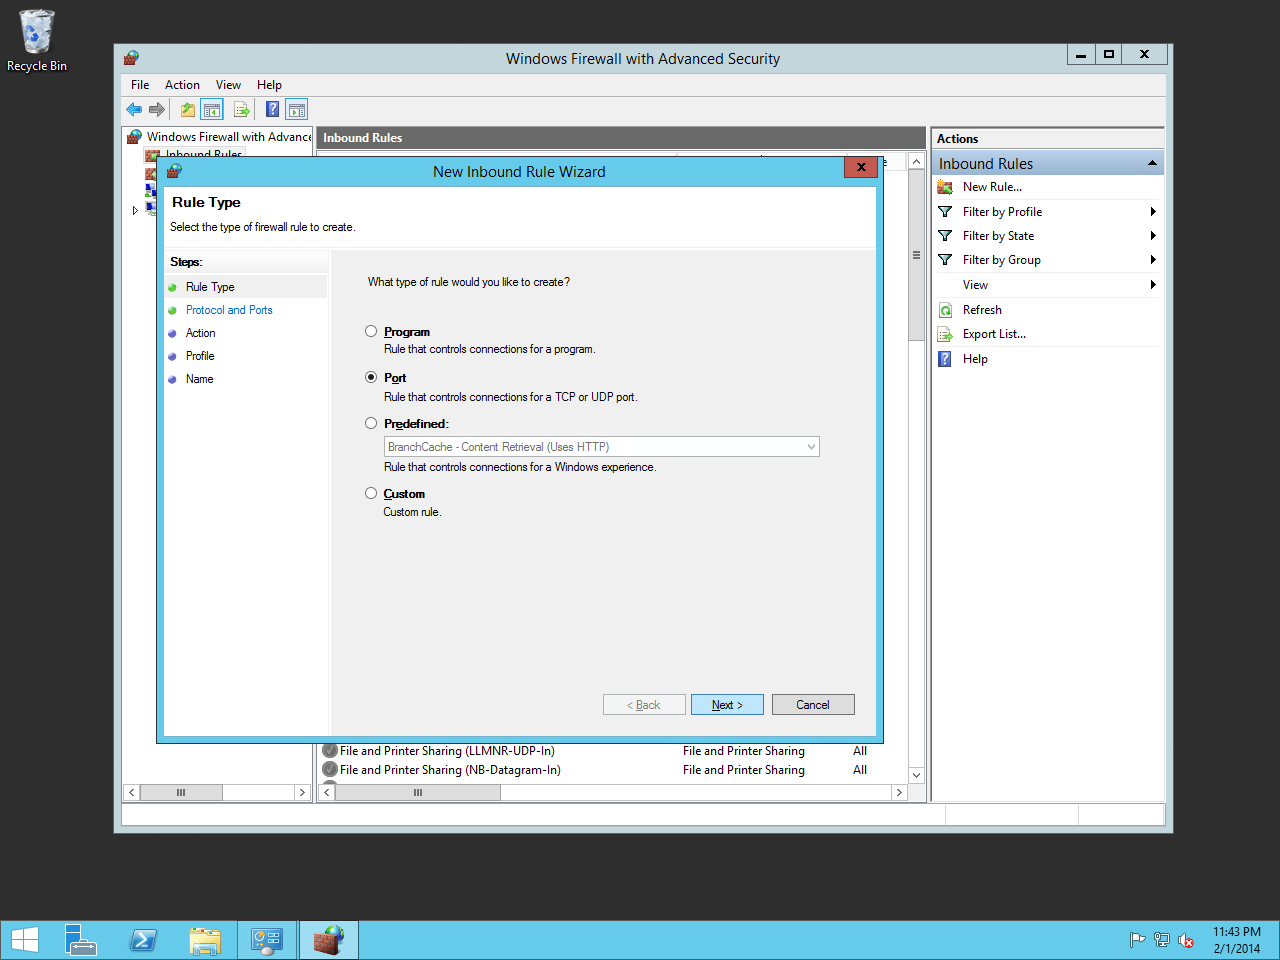
Right click on Inbound Rules and click New Rule.
Creating a New Rule
Click on Port and click Next.
Define By Port
Choose TCP and type in the specified local port, "1433."
Specify Port 1433
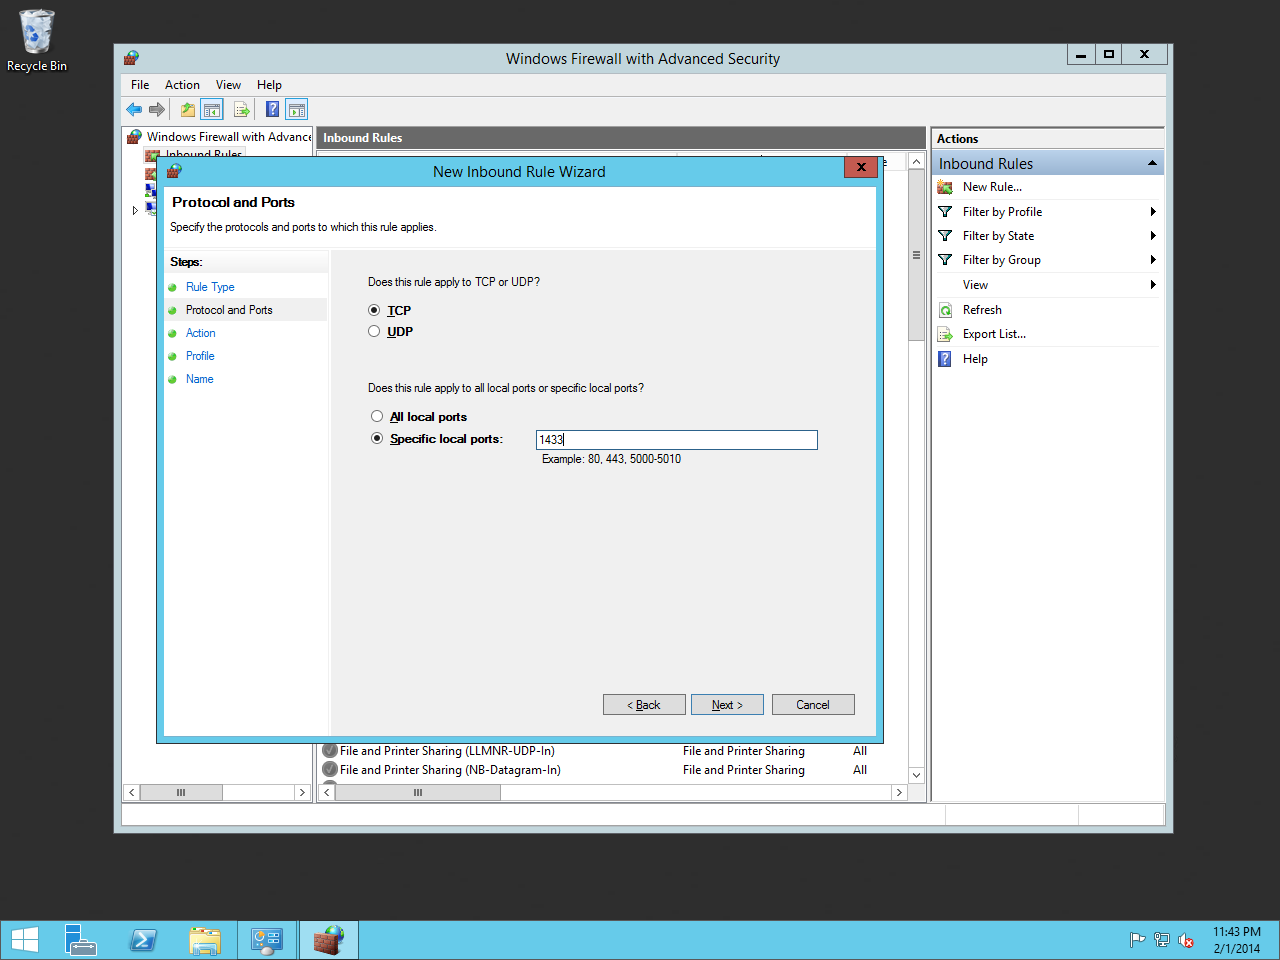
Click on Allow the connection and click Next.
Allow The Connection
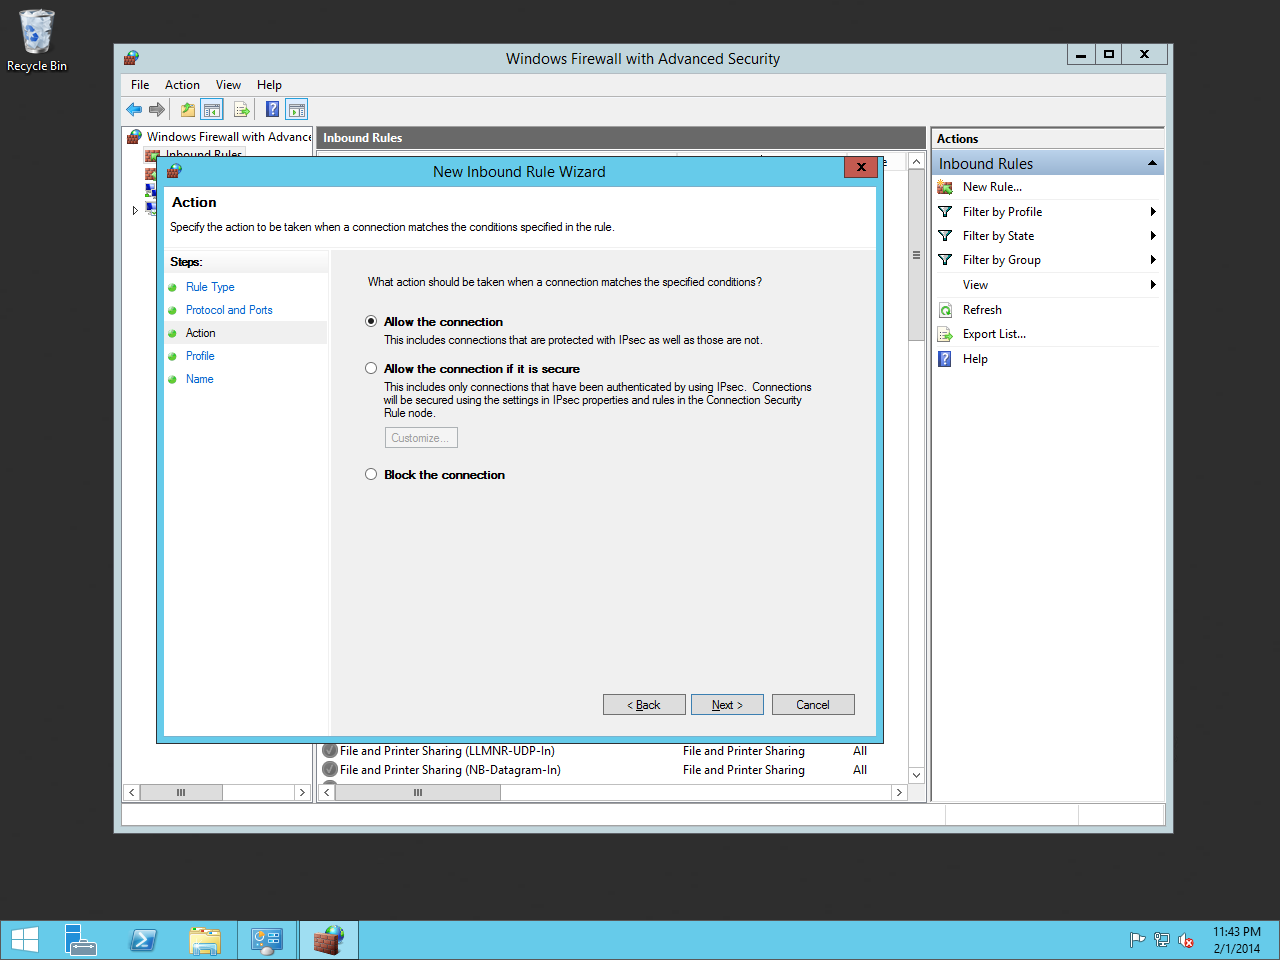
Choose which profiles this rule is applied to and click Next.
Firewall Profiles
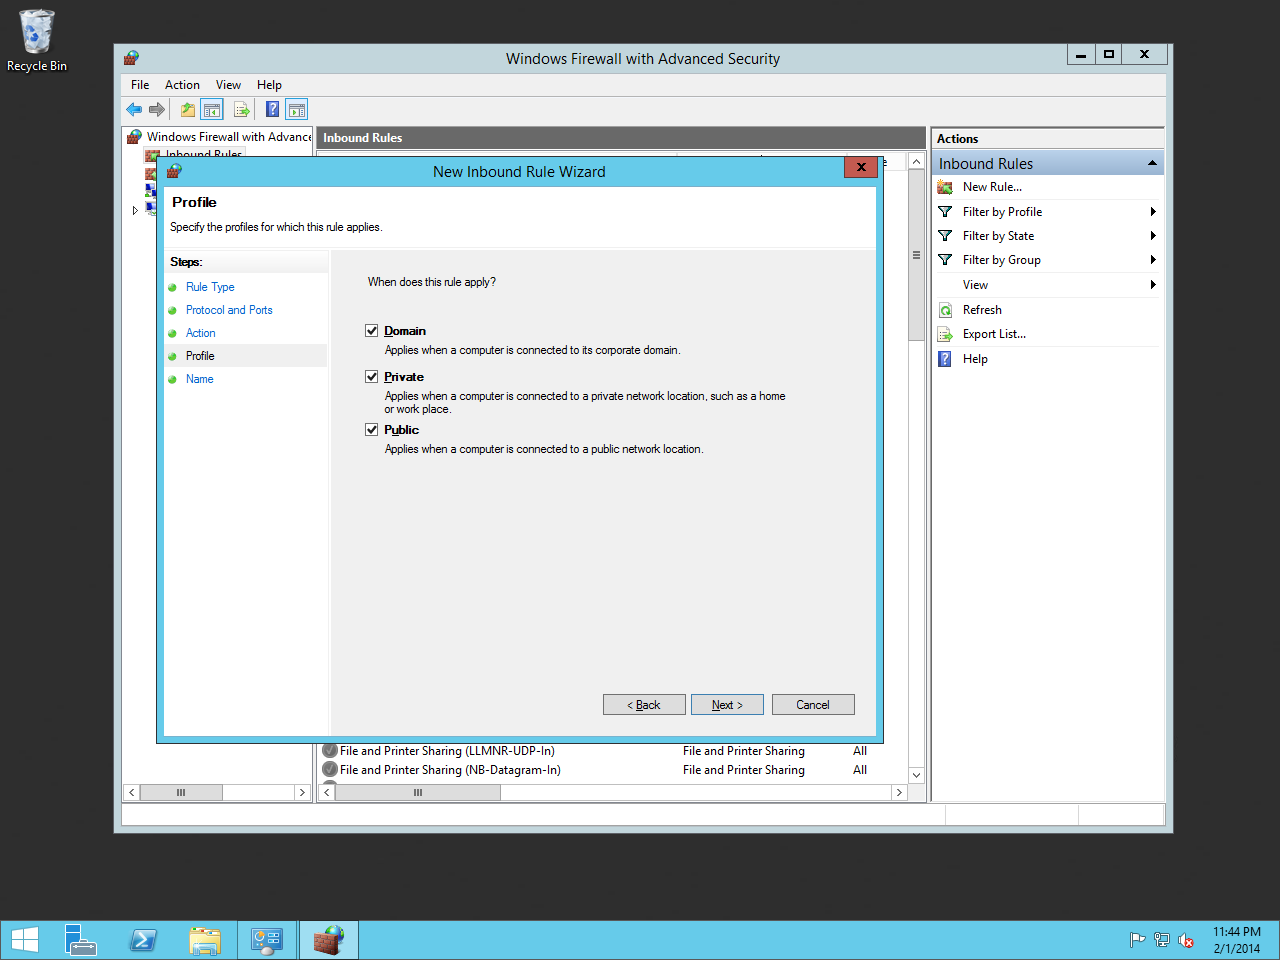
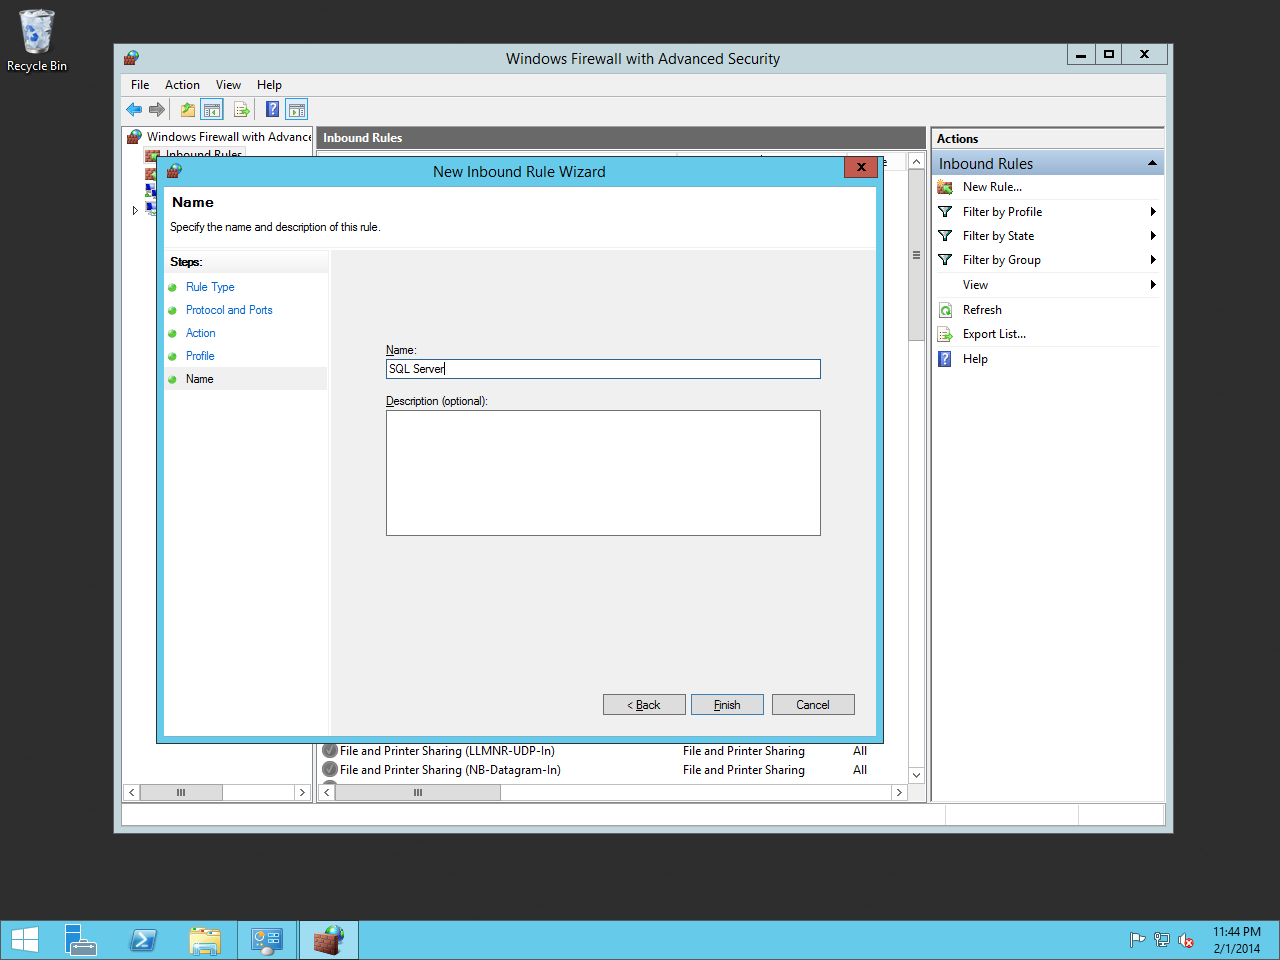
Give the rule a name and click Finish.
Firewall Rule Name
That's it! Let's move on to the next chapter.
Installing Rock
Now that our foundation is set, we can begin the best part - installing Rock!
The first thing we need to do is to download the Rock installer, which
you can find at rockrms.com/Rock/GetStarted.
Place the Start.aspx file from the installer package in the root of the
web folder. By default, the web root folder will be located here: C:\inetpub\wwwroot.
Open up a web browser and go to http://localhost/Start.aspx to begin the installation process.
Rock Installer

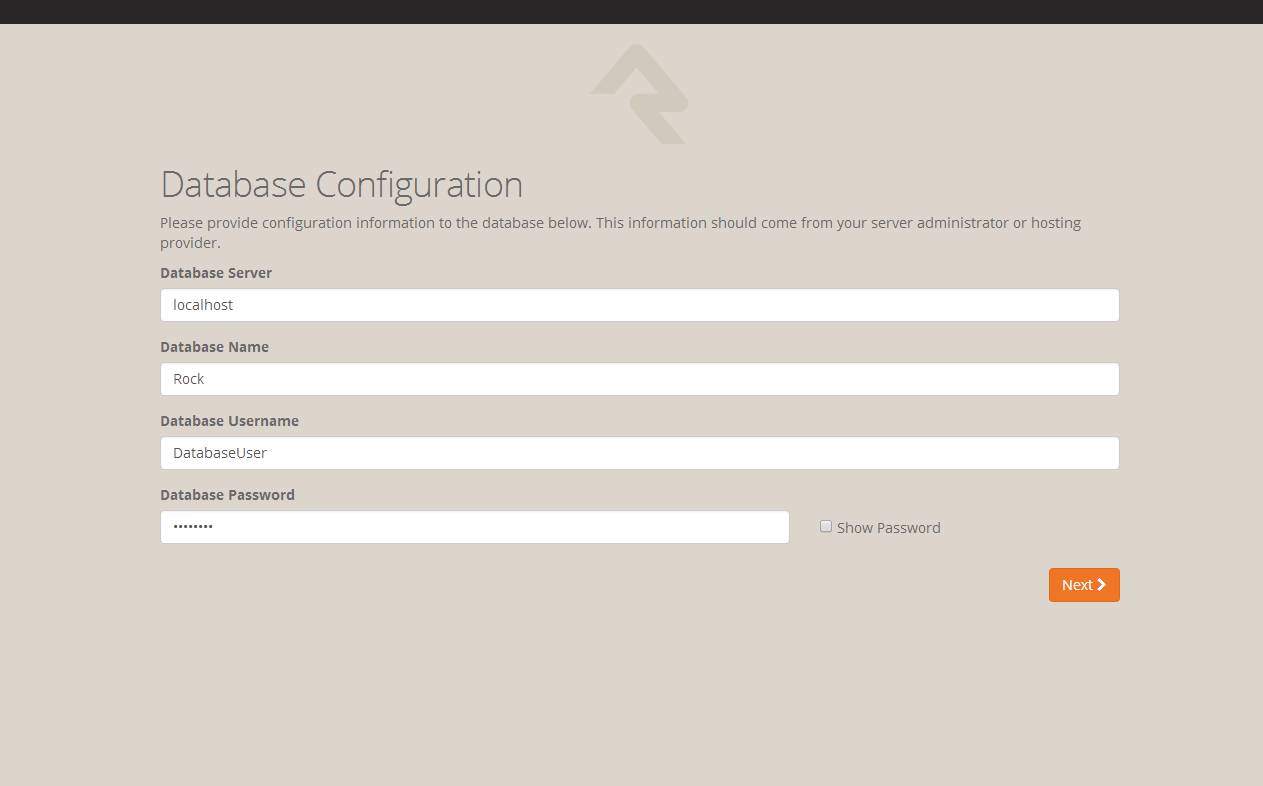
Now we will enter in the SQL server information. If the SQL server is installed on this server,
you can type in "localhost" in the Database Server box. If you are using another server for SQL,
you can enter the server name instead.
Next, enter in a name for the Rock Database (e.g. "Rock") and enter in the username and password
we created earlier in the SQL Chapter. Click Next.
Database Configuration
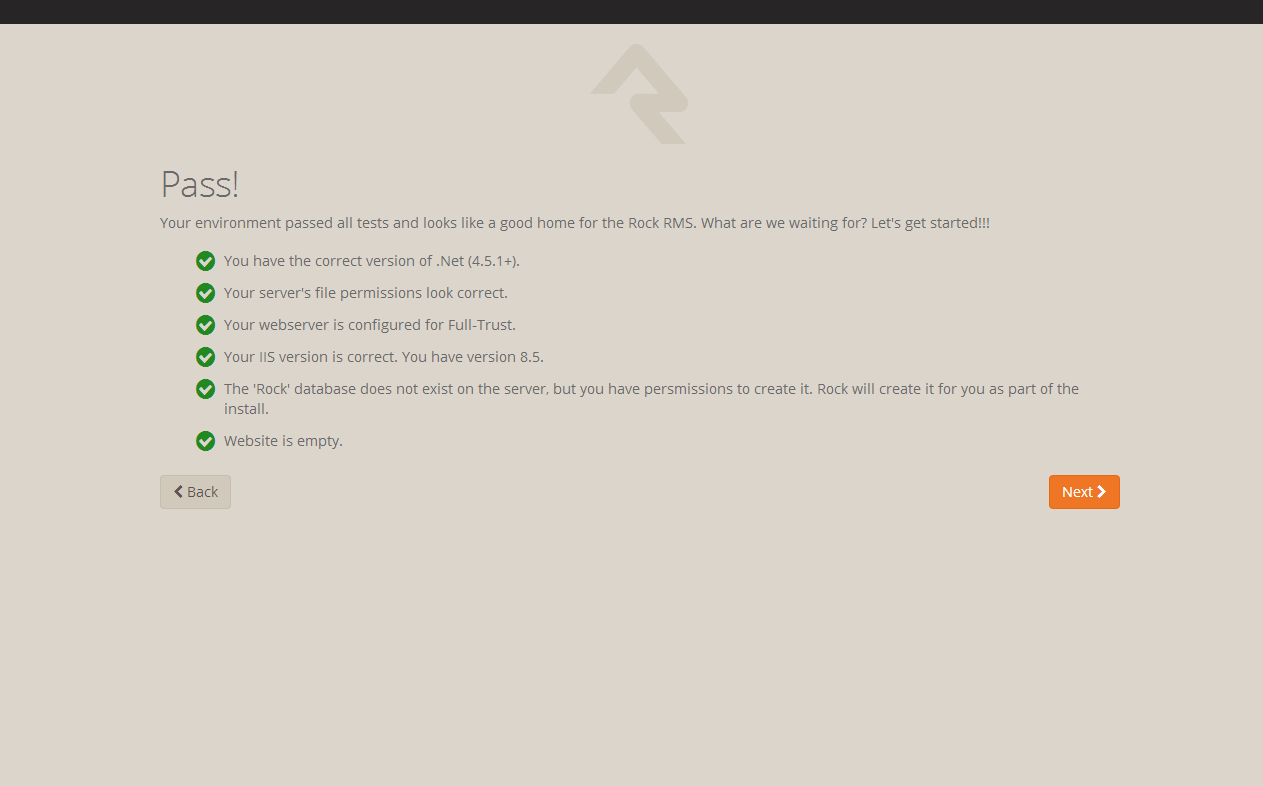
Now the Rock installer will run some checks to make sure the environment is ready
for use. If everything checks out, you will see the Pass! screen. Click Next.
Environment Checks
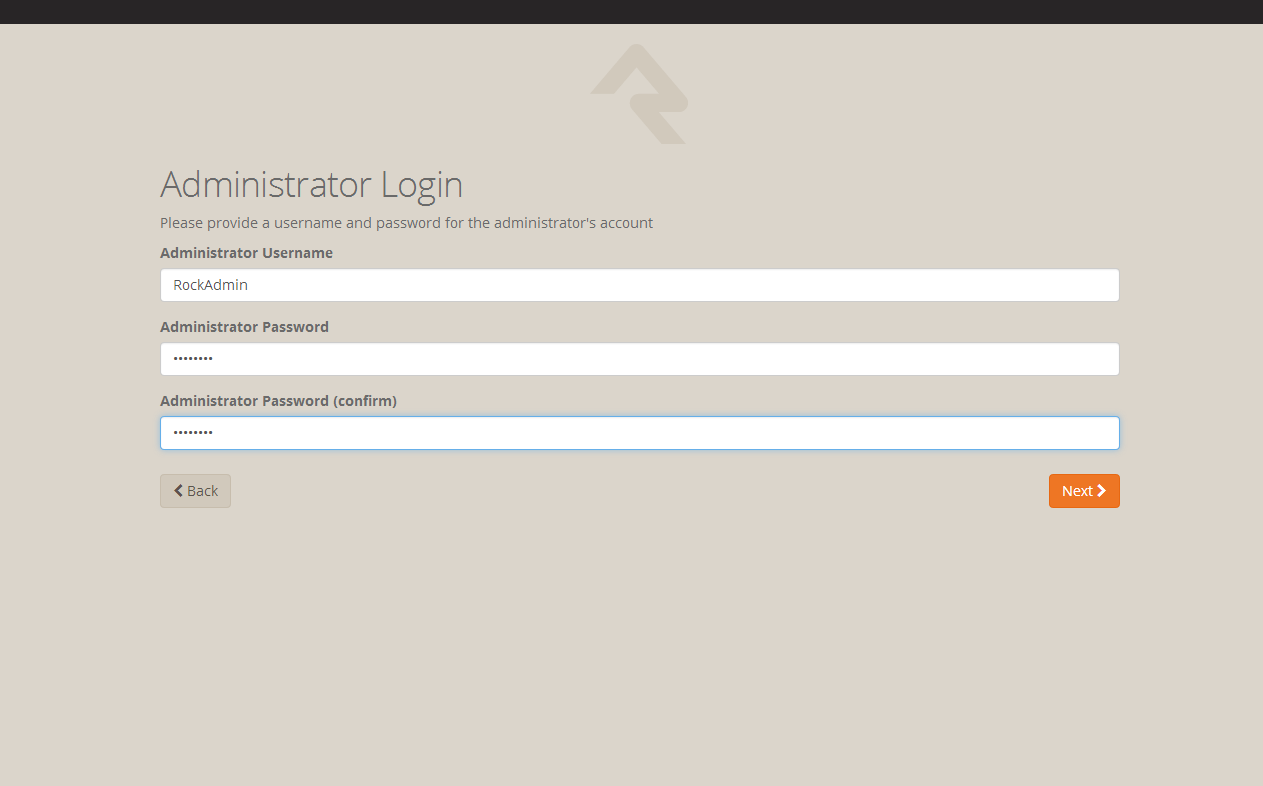
The next screen will allow us to create an admin username
and password for Rock. This will be the default admin account for Rock. Click Next.
Note:
We recommend using a general or organization account, not a personal one. You can create your own login after the install.
Admin Account Setup
Now you'll need to enter in your organization URLs.
- Internal URL: The web address you'll use to
to connect to Rock internally. (Example: http://admin.rocksolidchurchdemo.com)
- Public URL: The public facing website
for your organization. (Example: http://www.rocksolidchurchdemo.com)
Note:
Don't worry if these addresses aren't configured to point to your new server yet.
These addresses are intended to be the ones you'll use once you're ready to go live.
Hosting Configuration

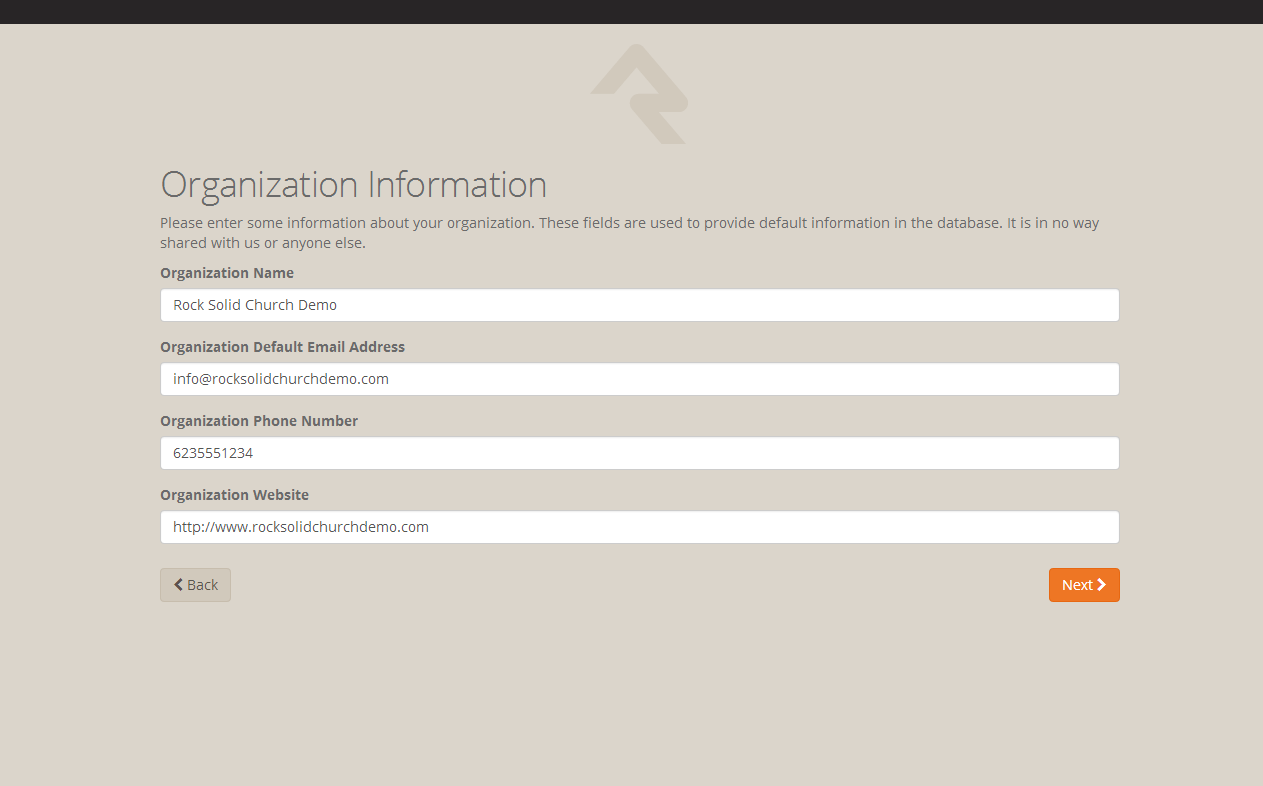
Now let's enter in your Organization Information.
- Organization Name: The name of your organization
- Organization Default Email Address: The default
email sending address for Rock
- Organization Phone Number: The main phone
number of your organization
- Organization Website: The website of your organization
Note:
Don't worry, these settings can be changed later under
Admin Tools > General Settings > Global Attributes
Organization Information
Next, we'll need to add your email server settings. These settings will
be used so Rock can send Communication emails to your organization's members.
If you don't have a self-hosted email server, there are many services out
there that can send email on your behalf. One of these is
MailJet www.mailjet.com. If you decide to use
a cloud-hosted email solution, speak with their support team to get the
required settings you need for Rock.
Tip:
See the Admin Hero Guide for more on email service settings and using email services.
http://www.rockrms.com/Rock/Book/9
Email Settings
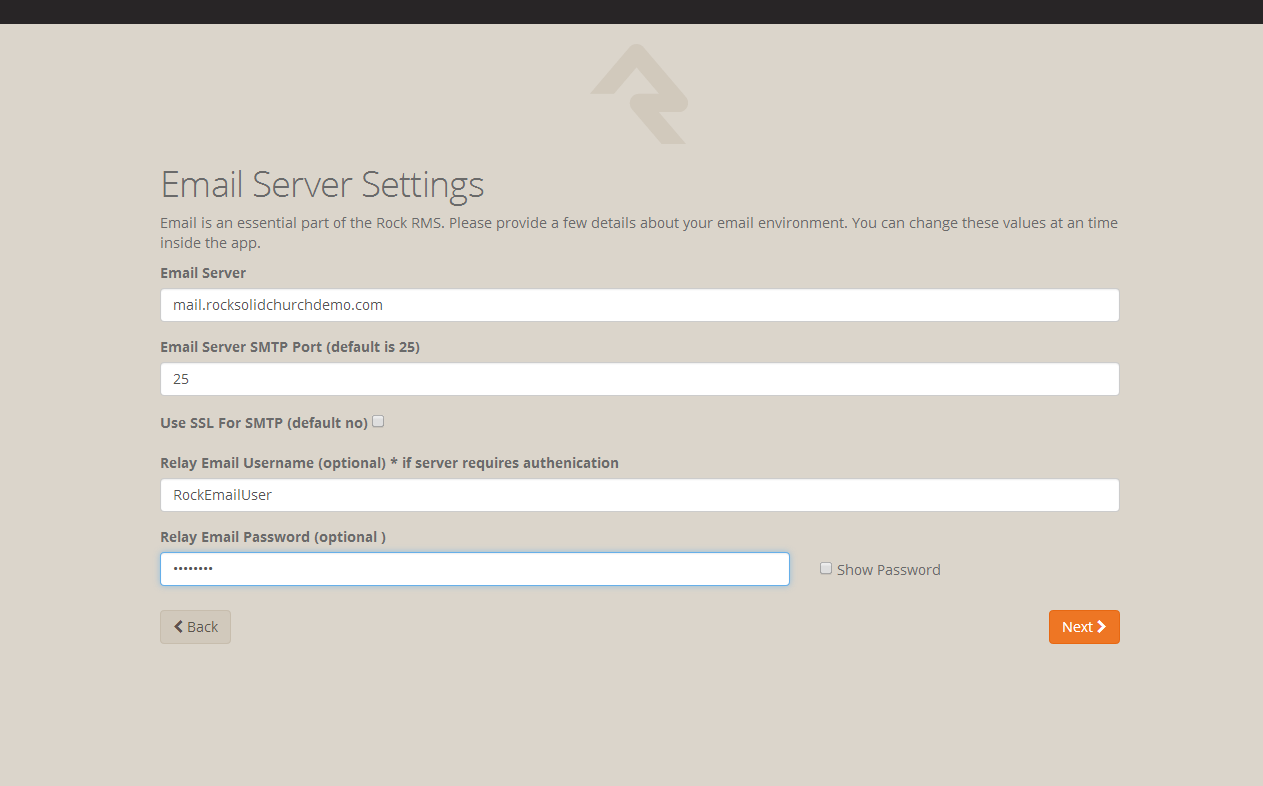
Note:
Your email settings can be updated at any time under
Admin Tools > Communication Settings > Communication Transports> SMTP
Now that you have all of your organization's information entered into Rock, click
Next to begin the Rock installation.
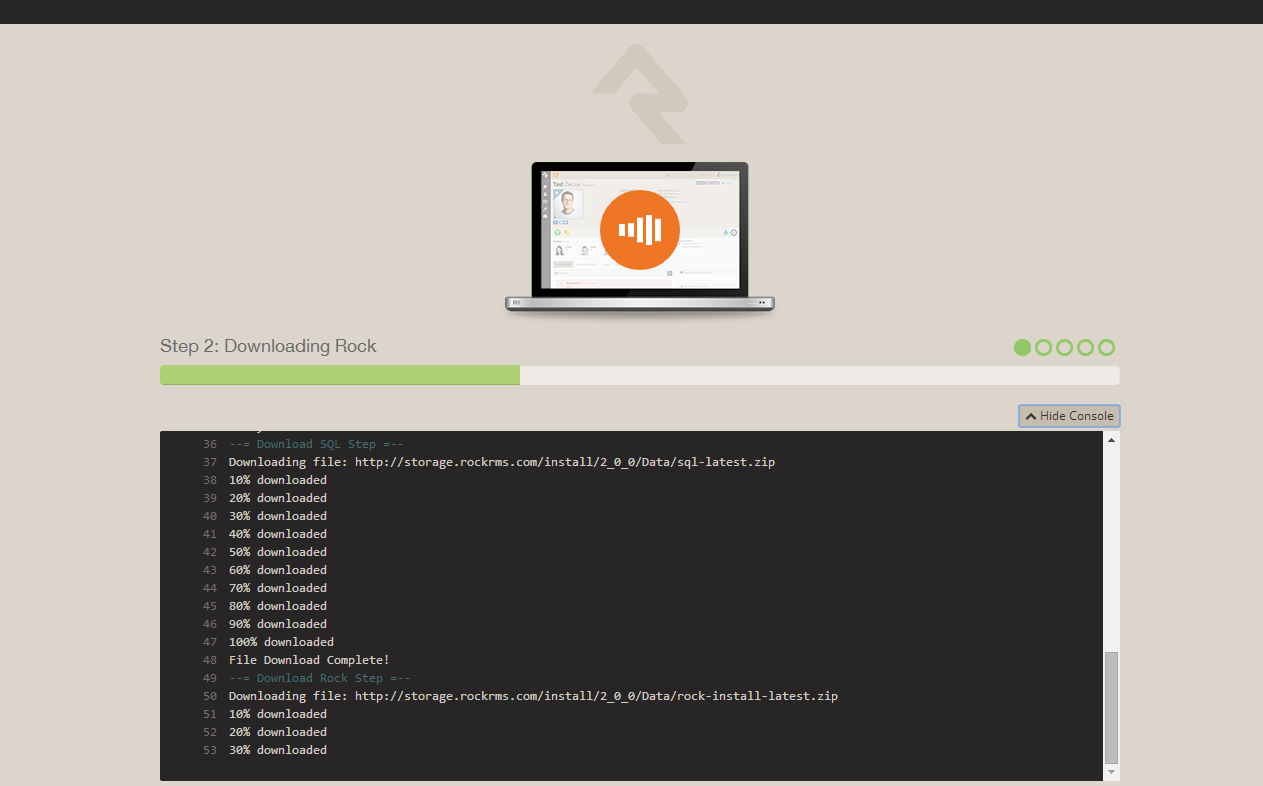
Installation Progress
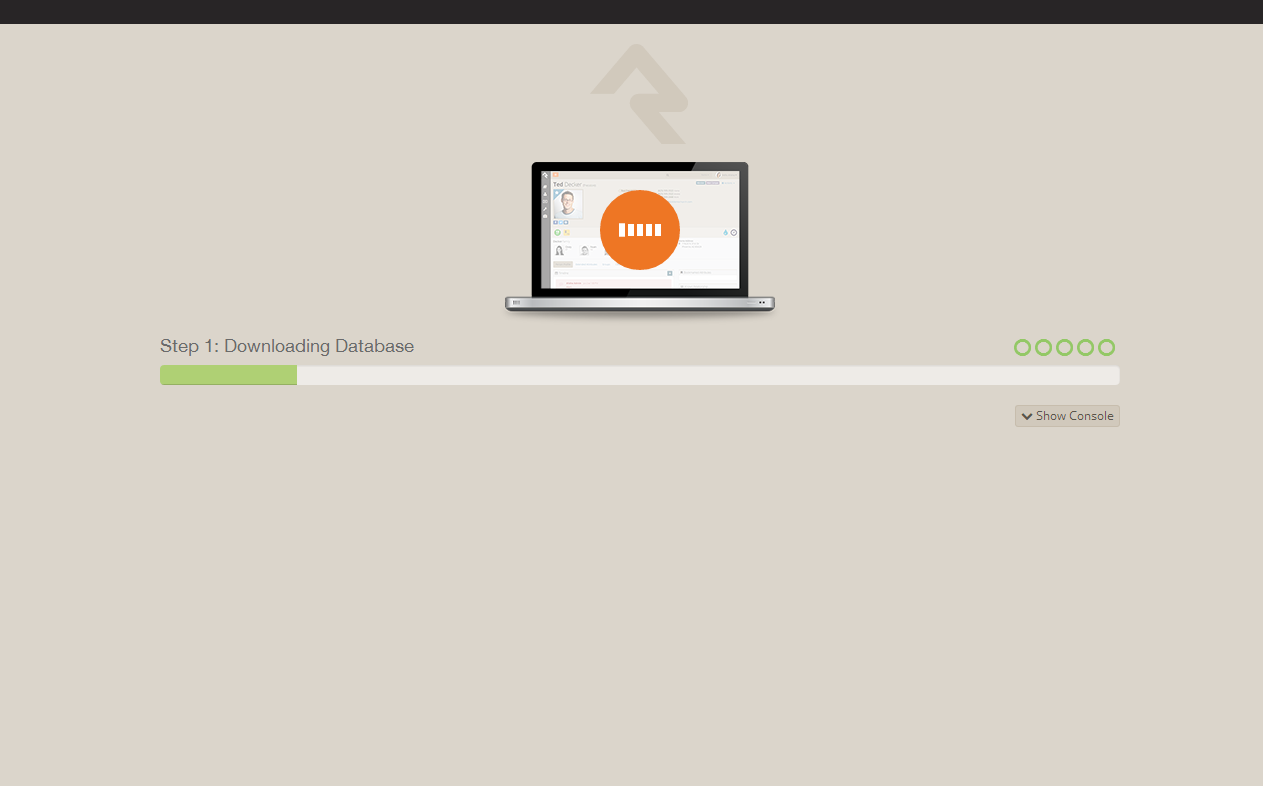
Rock will begin downloading the needed files onto the webserver and configuring the database.
You can observe this process by clicking on the Show Console button.
Installation Console
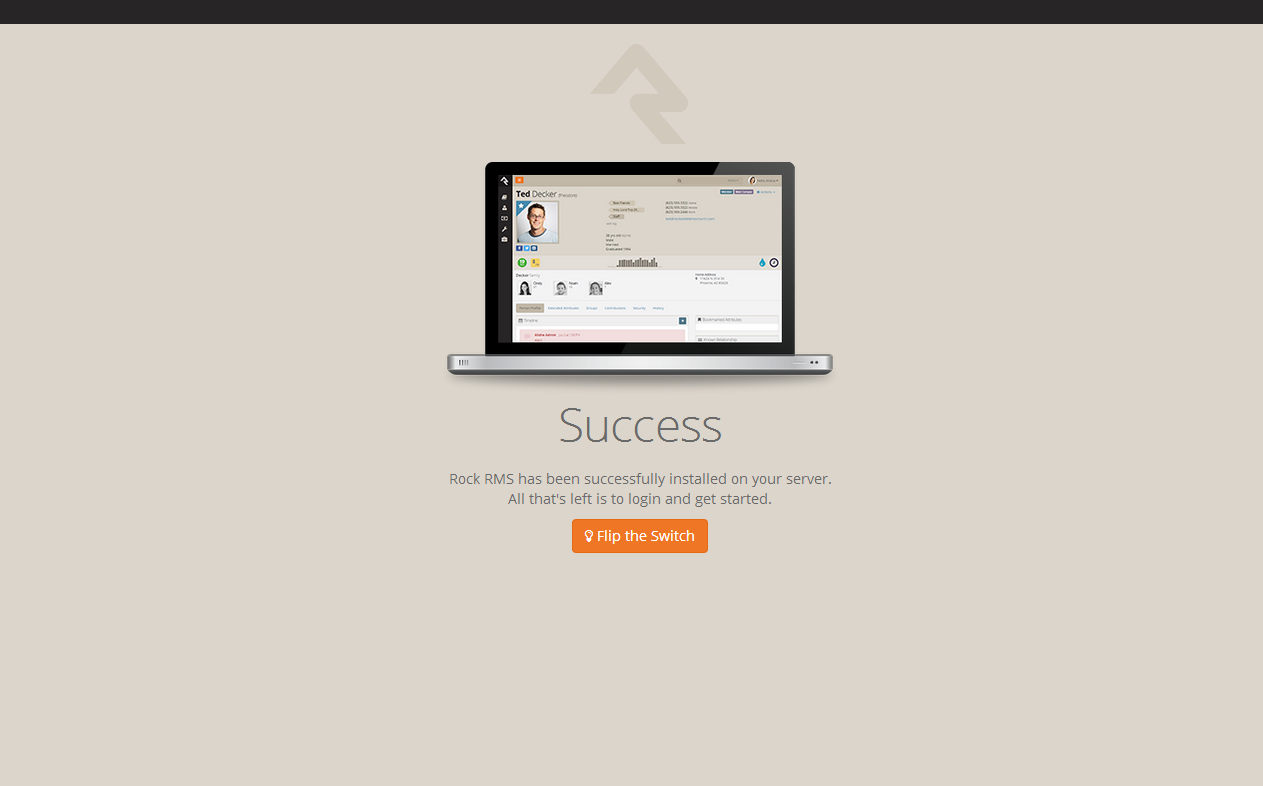
When complete, click on the Flip the Switch button.
Keep in mind, this loading screen will take the longest to load since Rock is starting up for the first time.
Installation Complete!
Note
If you arrive at the external site instead of the internal login page it could be that the
domain name is set to be used as the external site. When Rock isn't provided with a specific
page to load in the URL it looks at the domain and finds a site in the database that matches.
If this happens to you, you can get to the internal site by this URL: http://{yourserver}/page/12
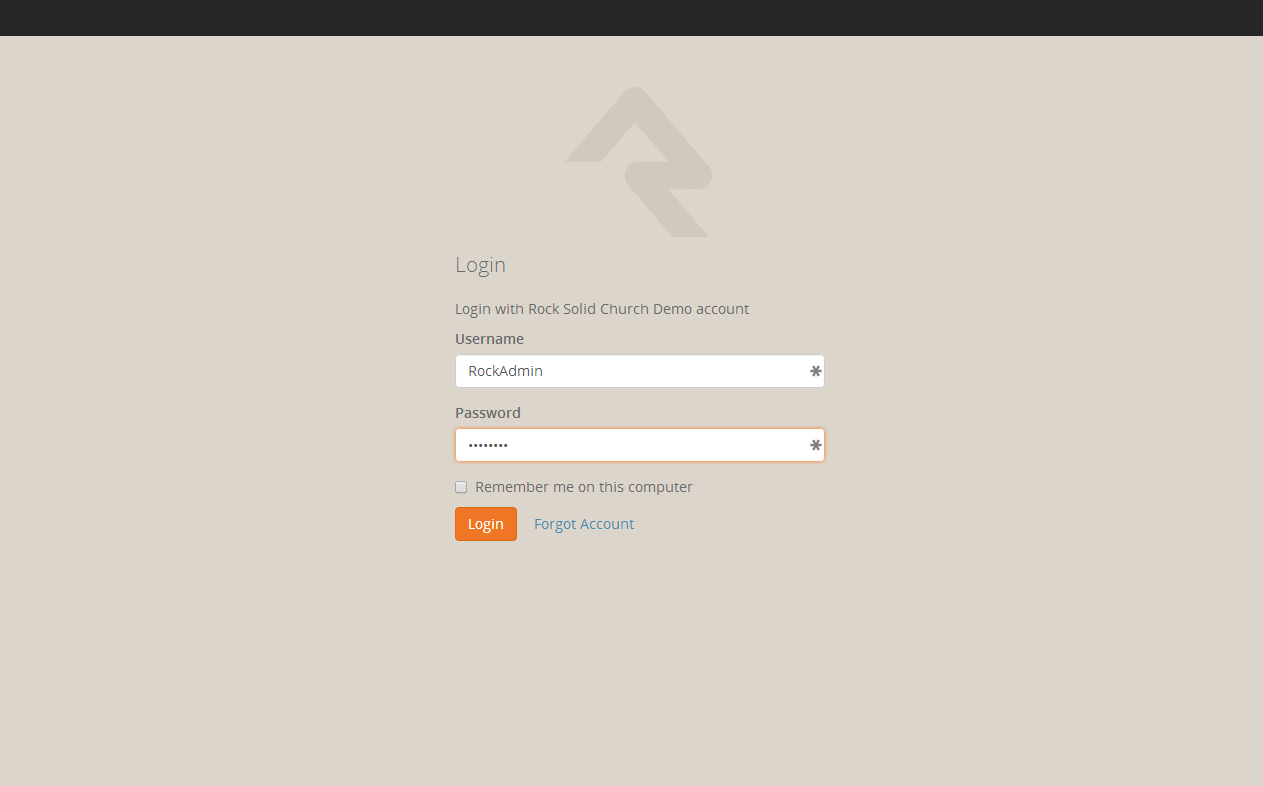
Now that Rock is installed, you can begin by logging in. Log in
with the Rock admin account you created during the installation.
Logon Screen
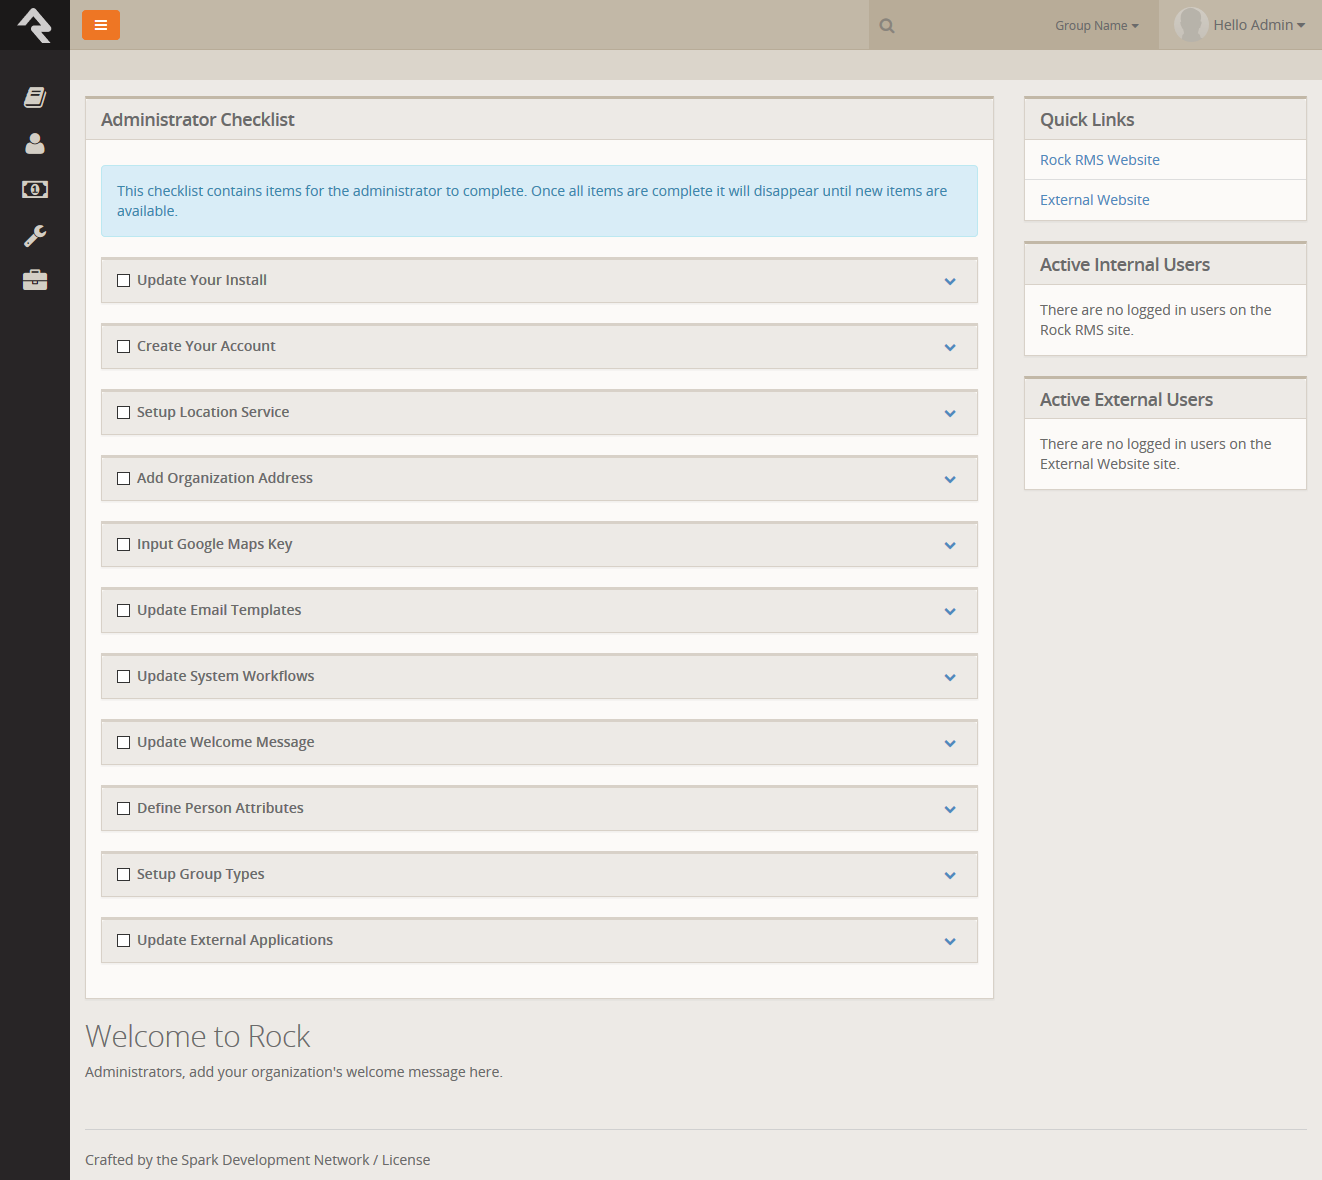
Once logged in, you'll be taken to the Rock homepage. You will
see the Administrator Checklist, which is a list of the recommended
first steps to maxmize the potential of Rock at your organization.
Don't worry about completing the list today. You can get to it as
you become more familar with Rock. The list will disappear once you
mark off all the items. It may reappear after updates, if special
configurations are needed. Think of it as a friend that only
shows up in your time of need.
Rock Home Page
Snapshot Isolation Settings
We recommend enabling snapshot isolation for your Rock database. This keeps database reads from being locked by database writes. Below are the settings
we recommend (found by right-clicking on the database name in SQL Server Manager and selecting Properties.)
Snapshot Isolation Settings
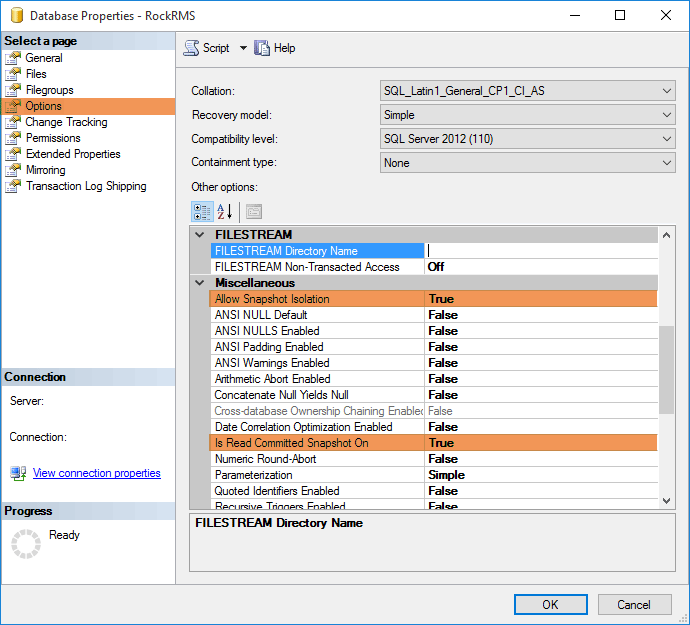
Default Settings May Vary
Depending on your SQL Server edition and version this may already be the default.
Special Configurations
In this chapter, we will go over some ways that you can maximize
the performance of Rock.
Two-Server Configuration
If you were looking at the system requirements in this
guide's introduction, you might have noticed that there is
a two-server configuration for larger installations. There are a
few benefits for this kind of configuration.
- Performance:
Having your Rock Database and Web Environment on seperate servers
means they won't be sharing resources and will be able to
perform at a higher capacity.
- Security:
If you plan to use a public website with Rock, you can put the
web server in a DMZ for added network security. Setting up a
DMZ is outside the scope of this guide, but if this is something
you plan on pursuing, reach out to the Rock
community.
It's All in the Details
The process for setting up a two-server environment is not
that much different from the single-server setup in this guide.
Here is a high level task list for each server:
Database Server
- Install & Configure SQL Server
Web Server
- Install the required Server Roles and Features
- Configure Internet Information Services (IIS)
- Point Rock at the database server during installation
Be sure to check out the rest of the Rock guides and manuals to help you get started.